Moxie Block Blanket Crochet Pattern
“Moxie = Force of character, Determination, Nerve.”
We could all use more Moxie in our life…
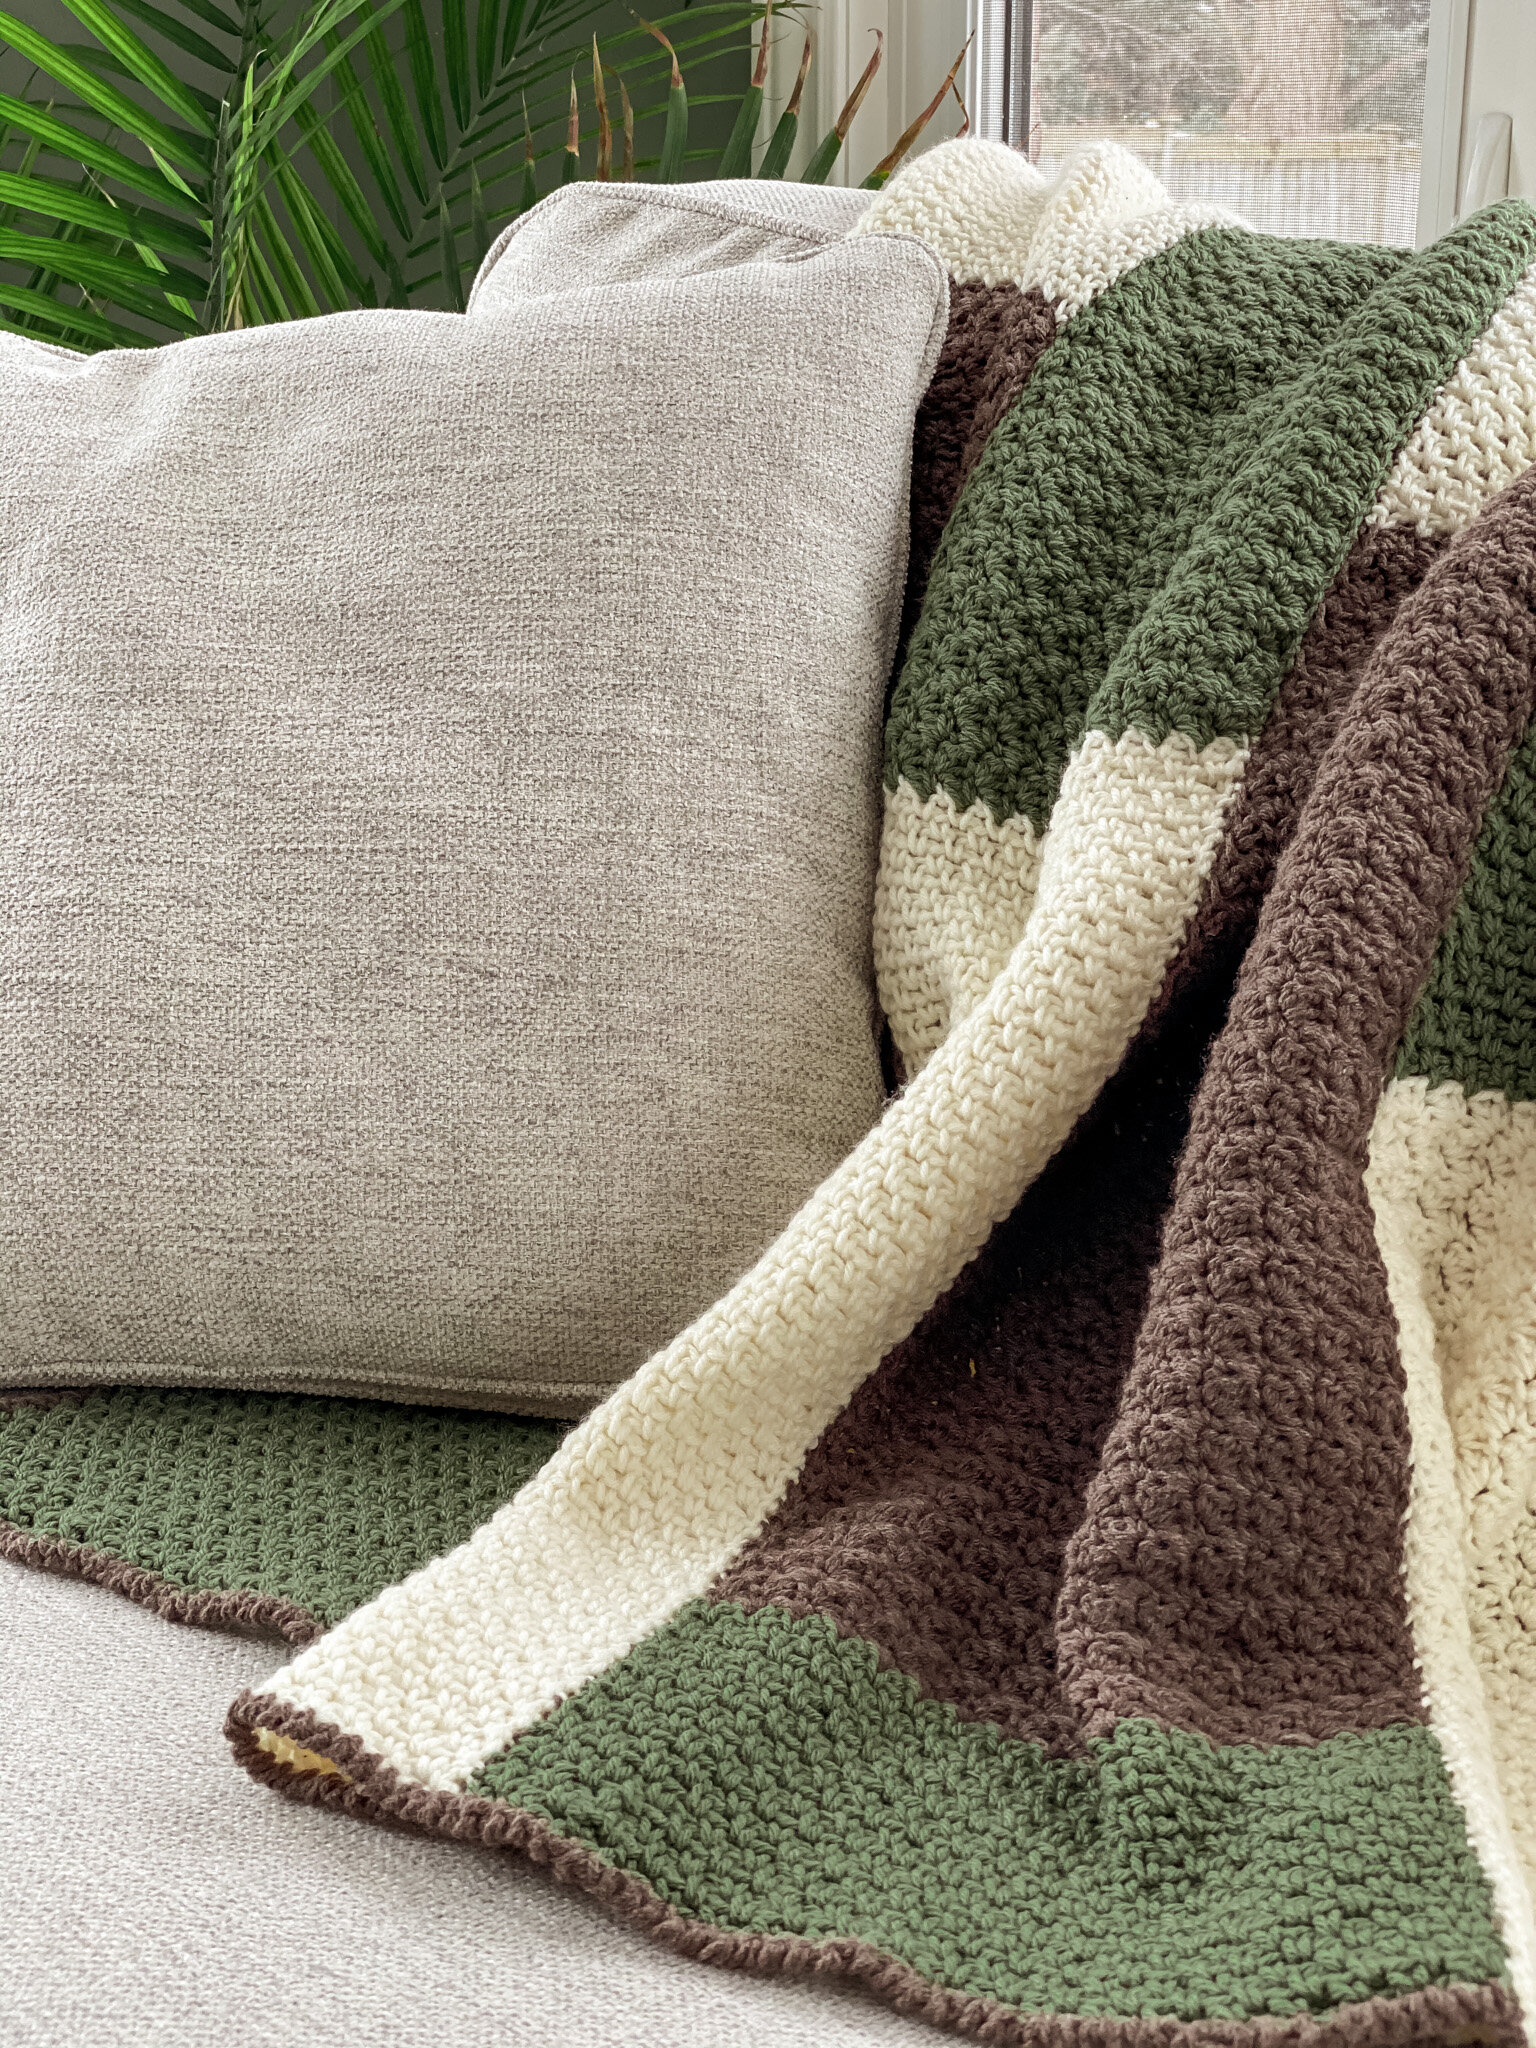
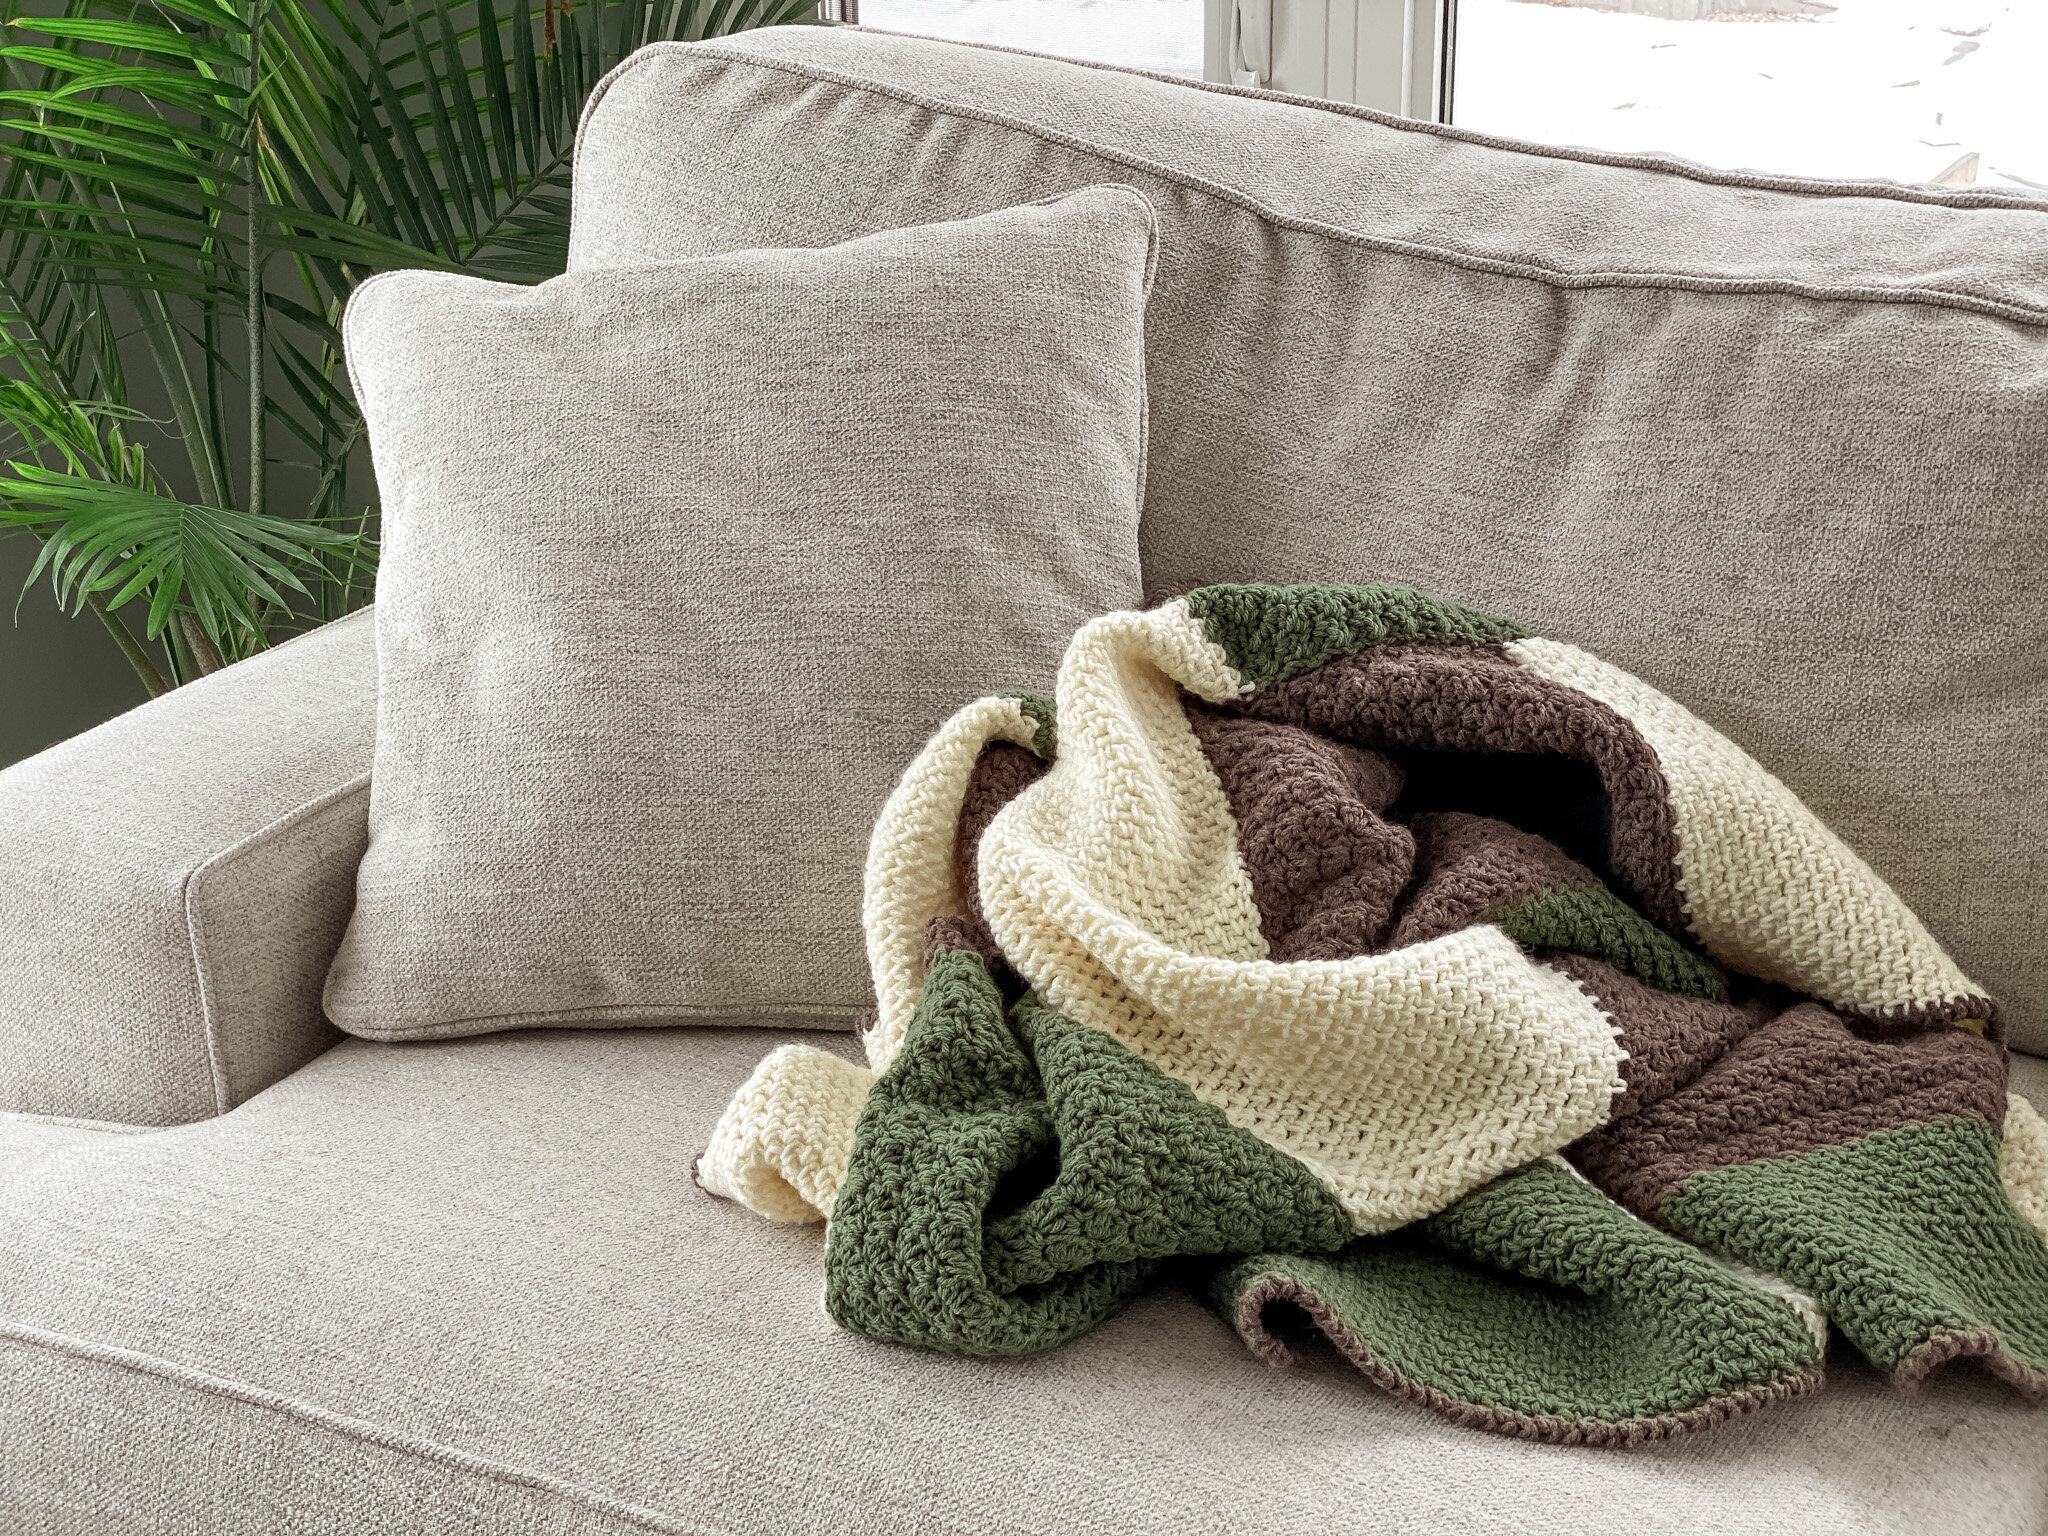
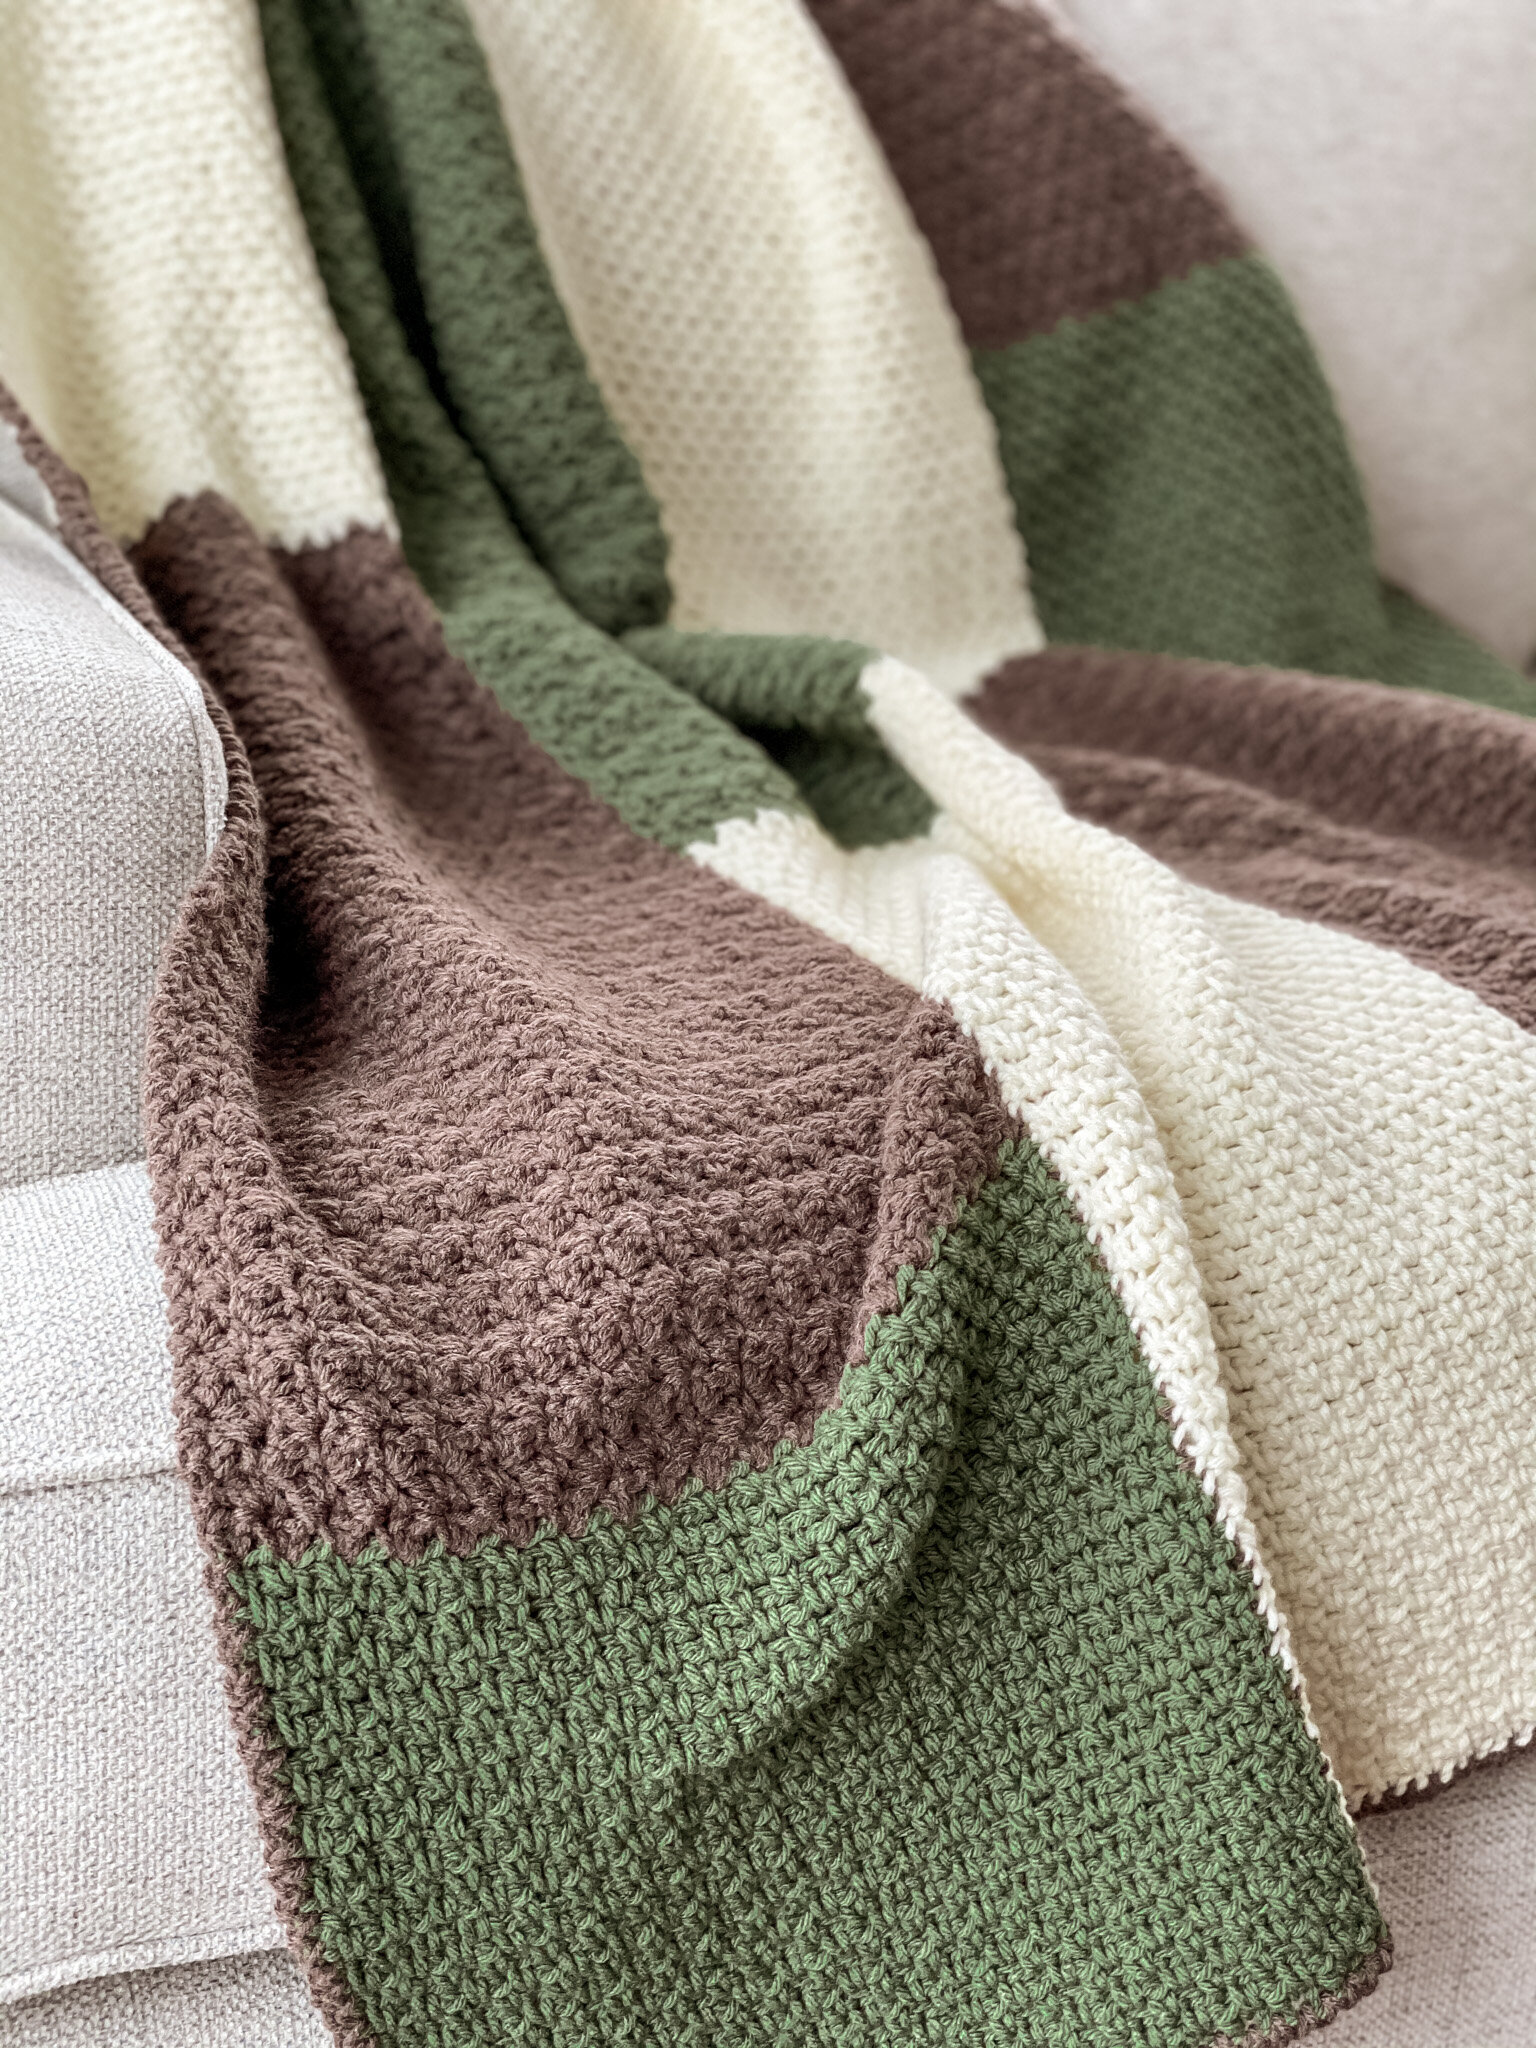
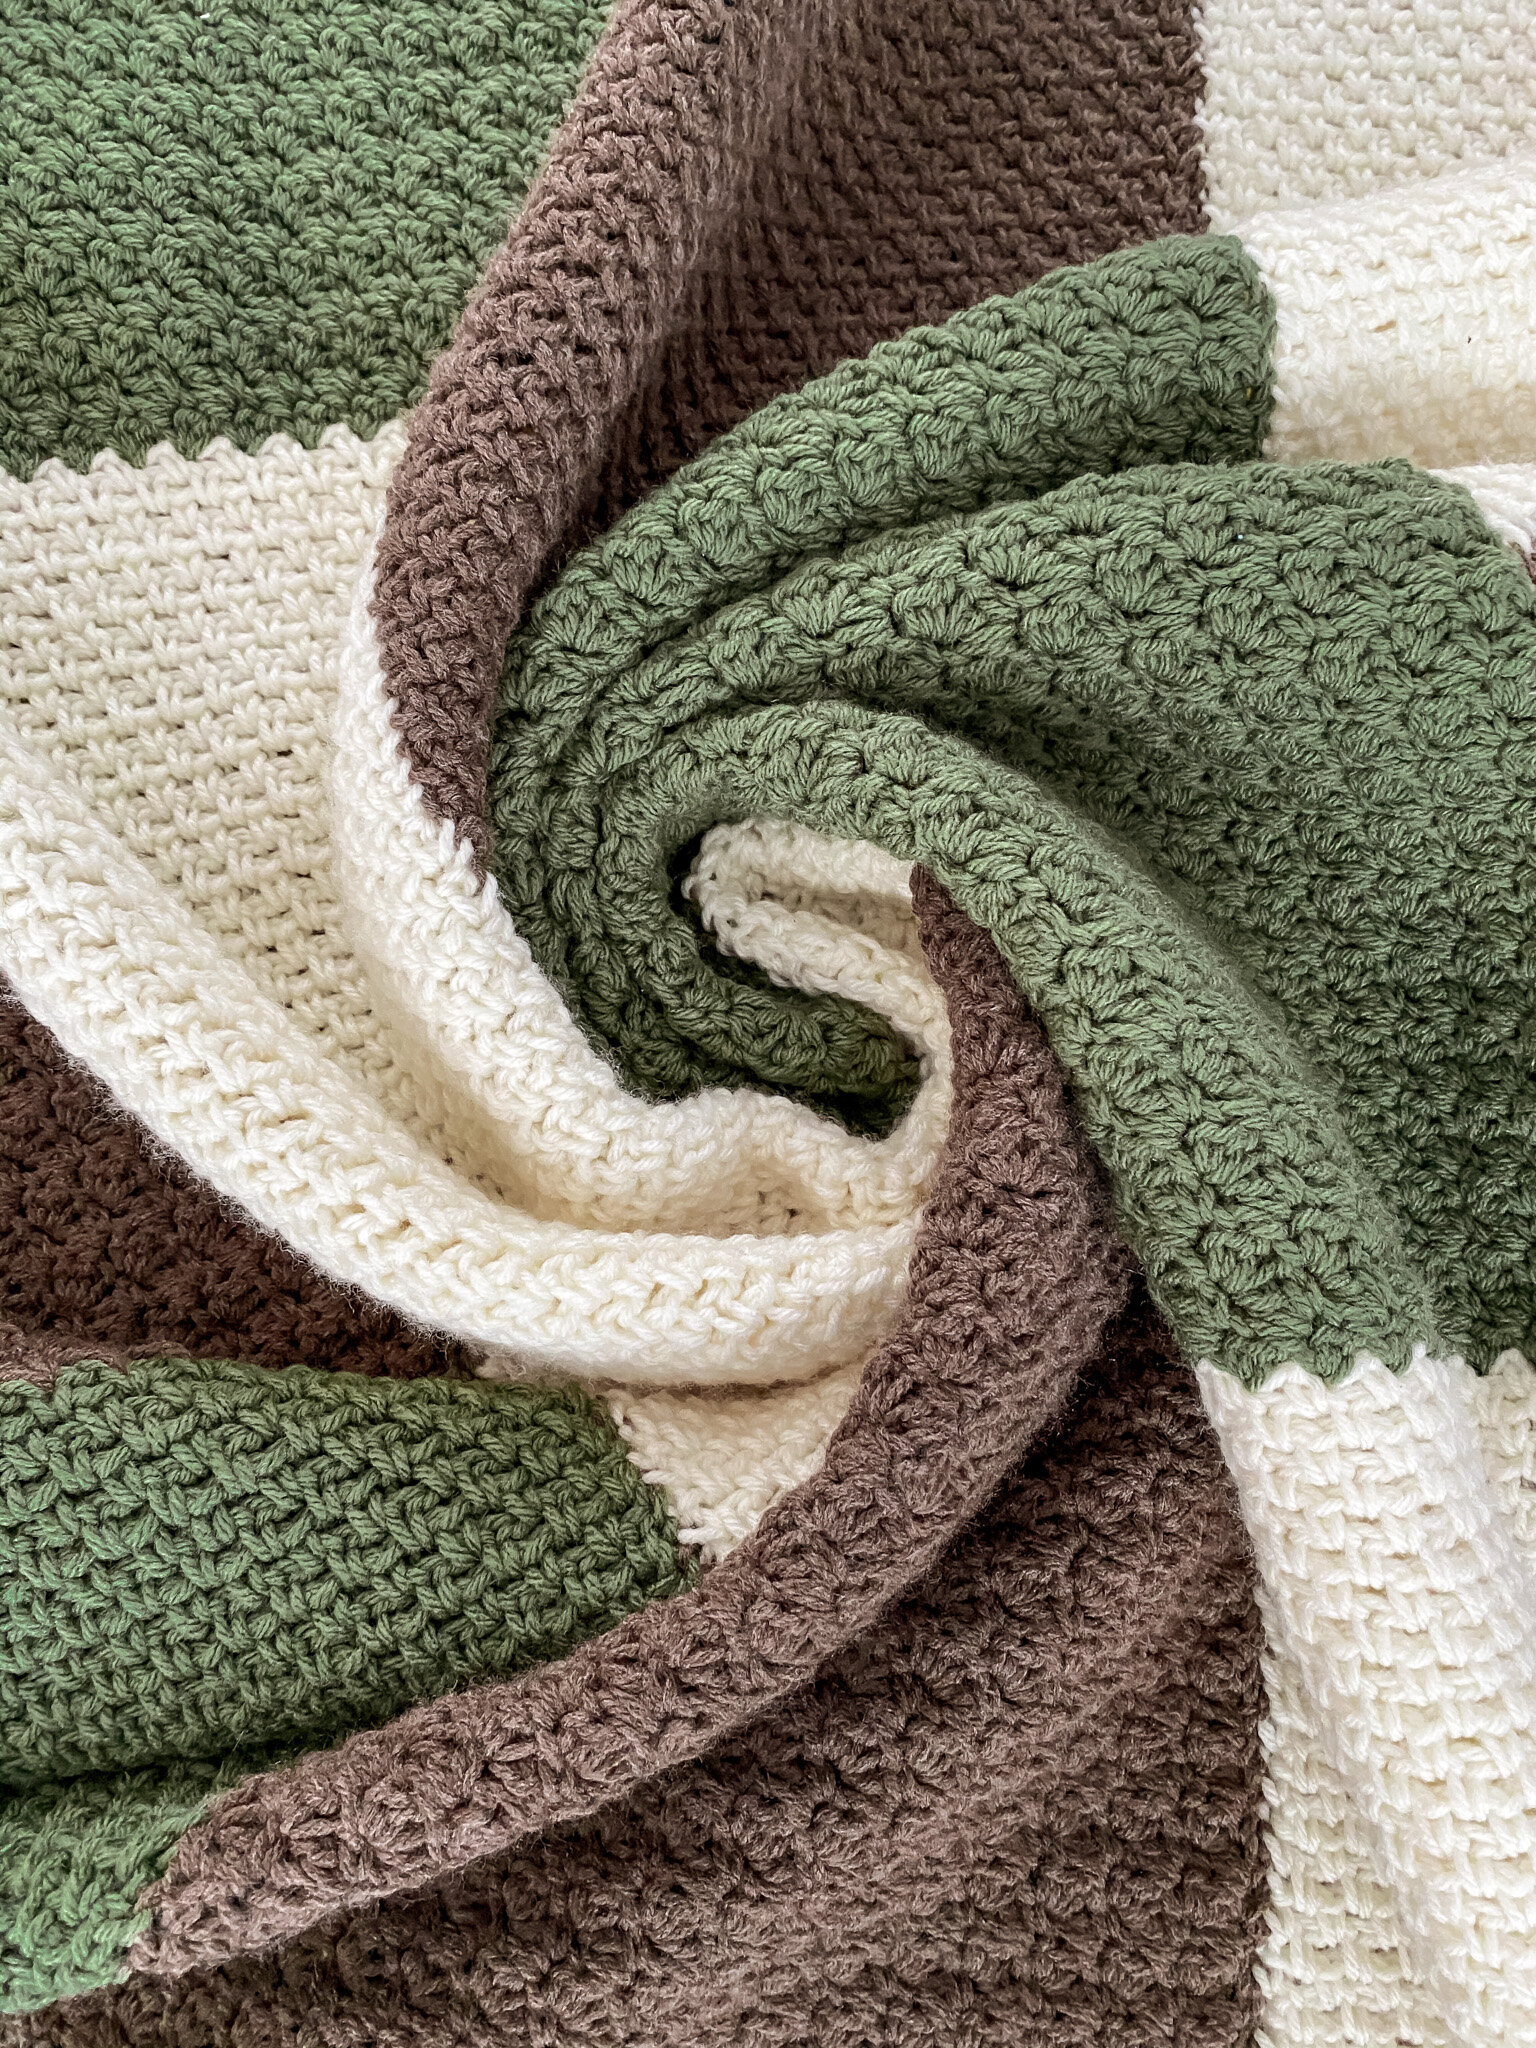
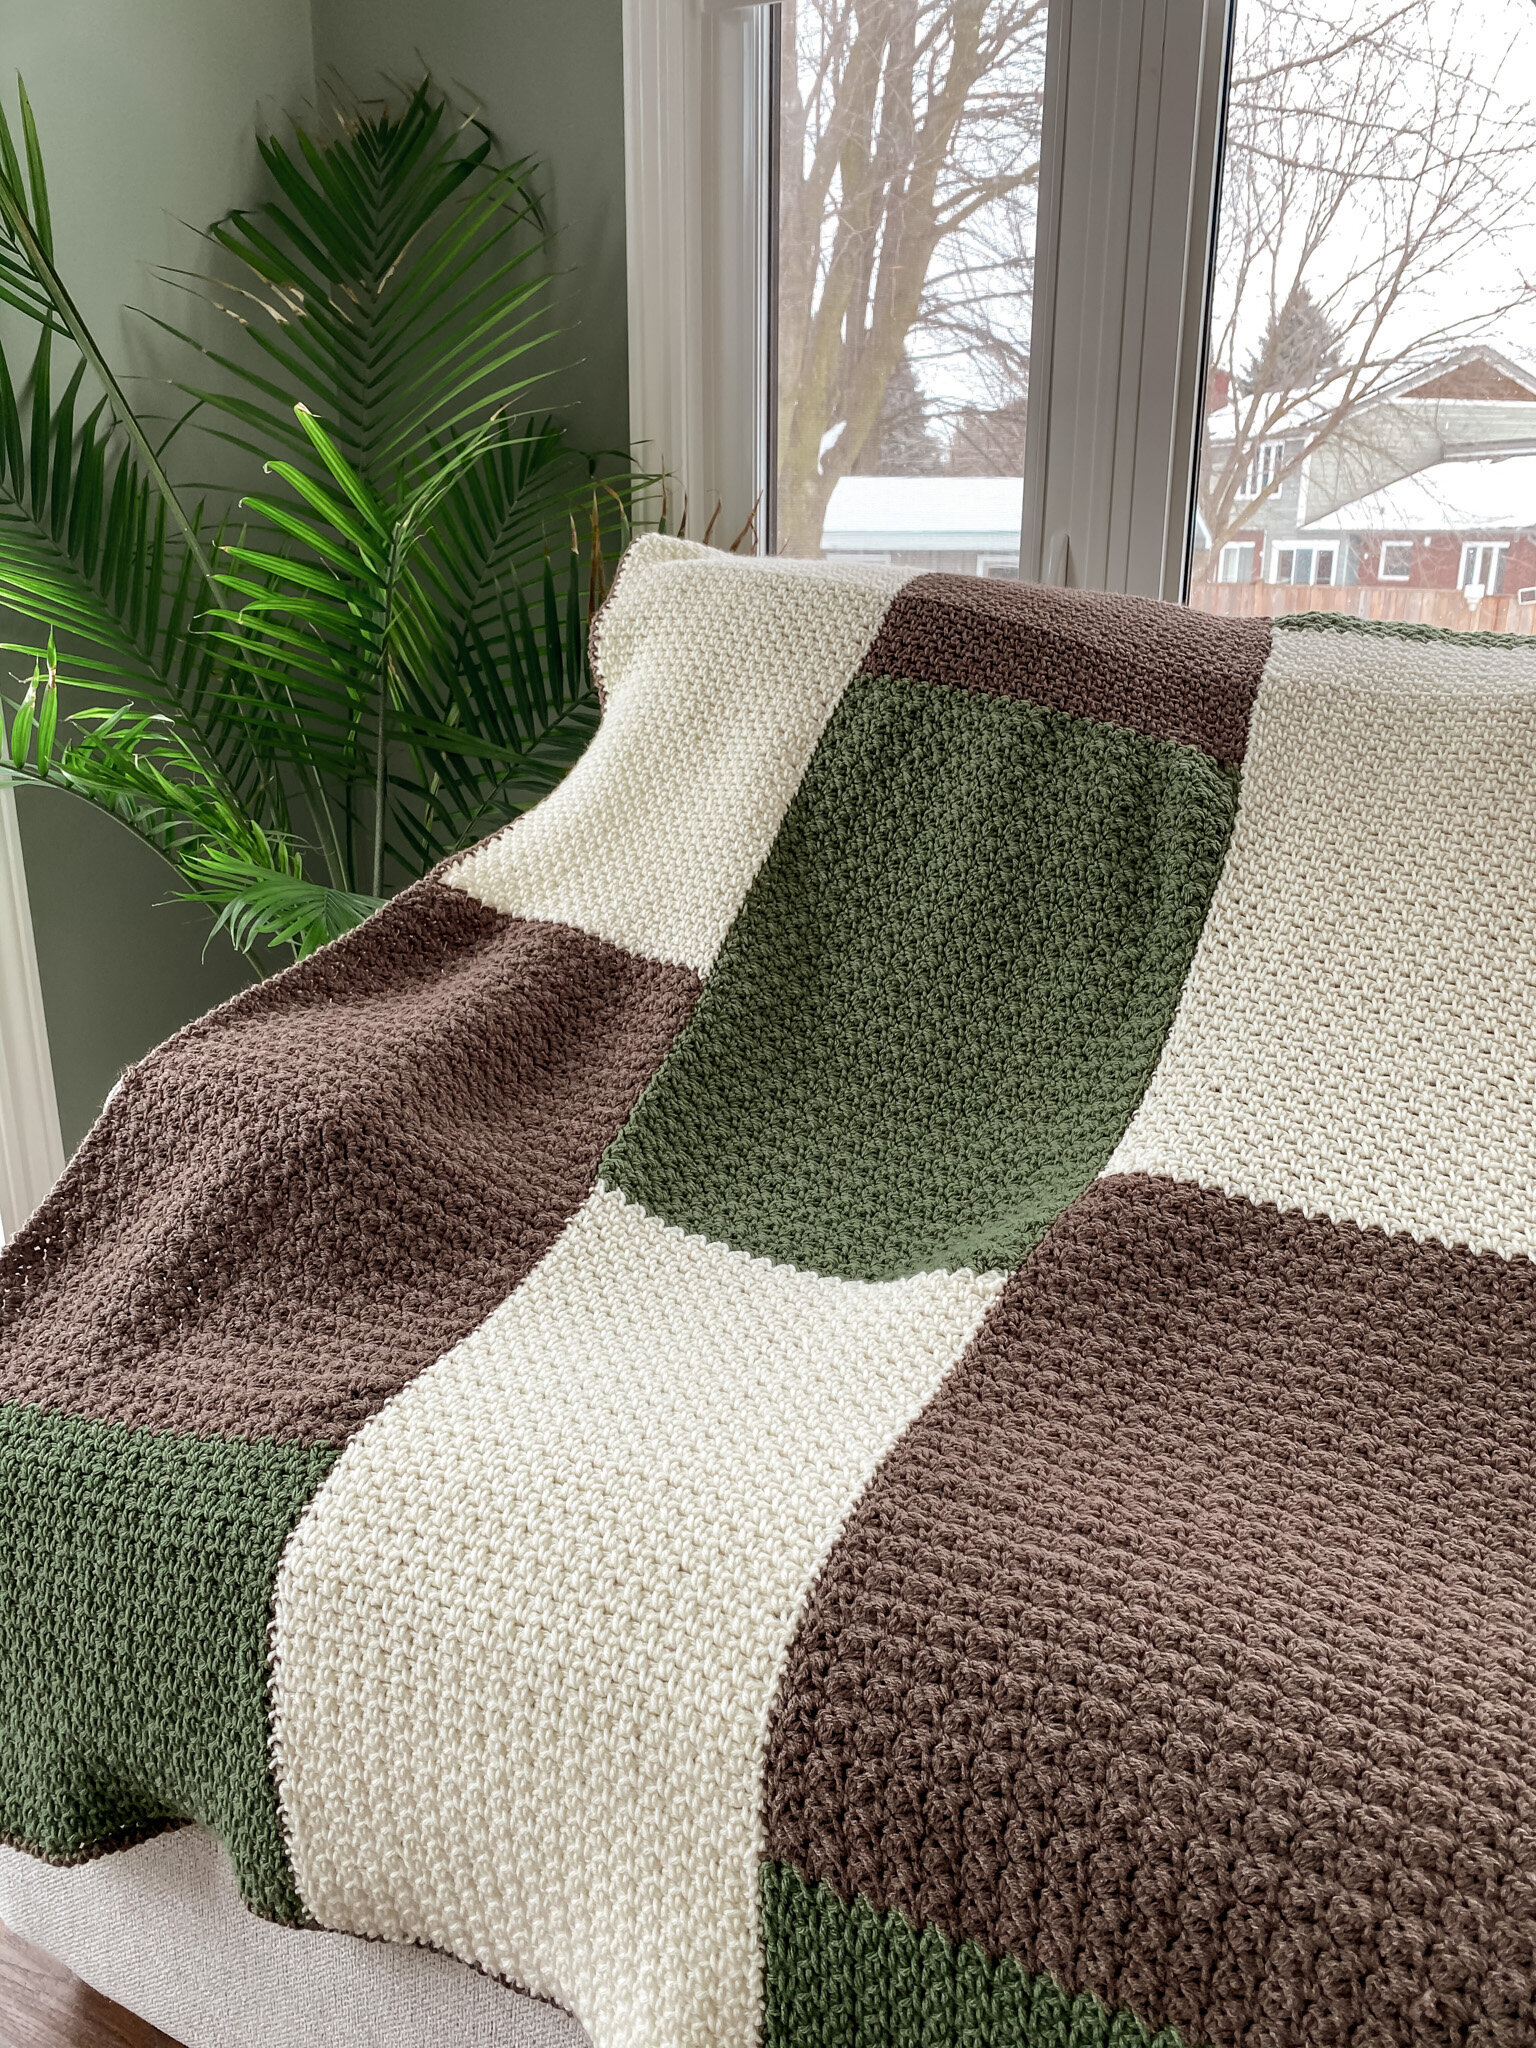
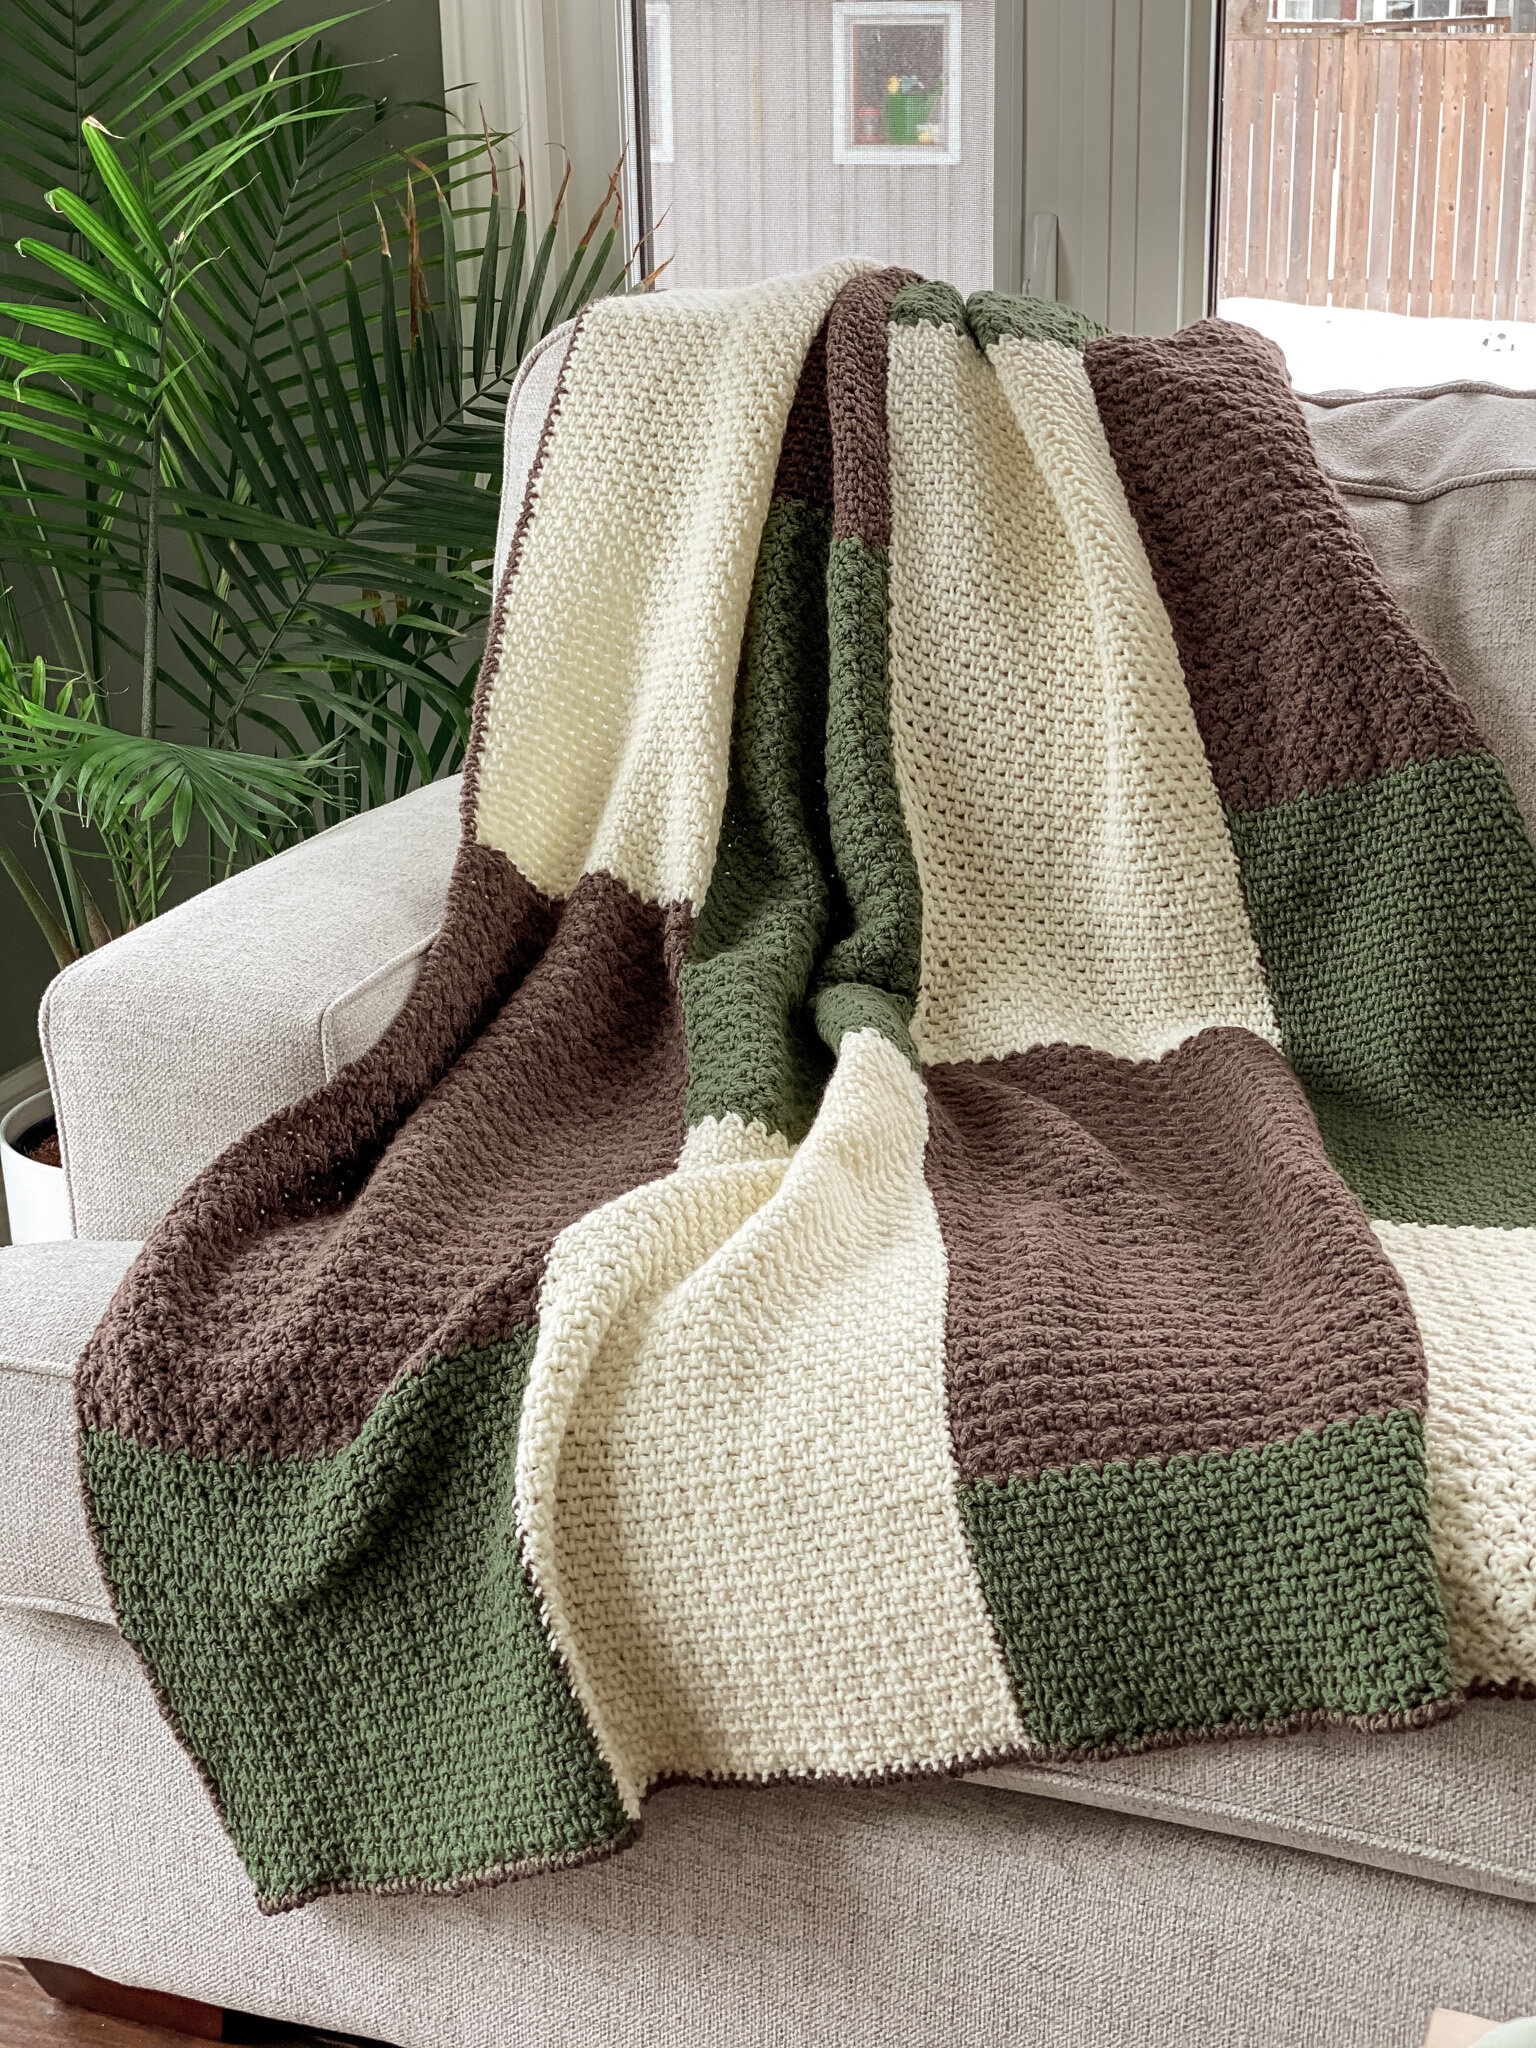
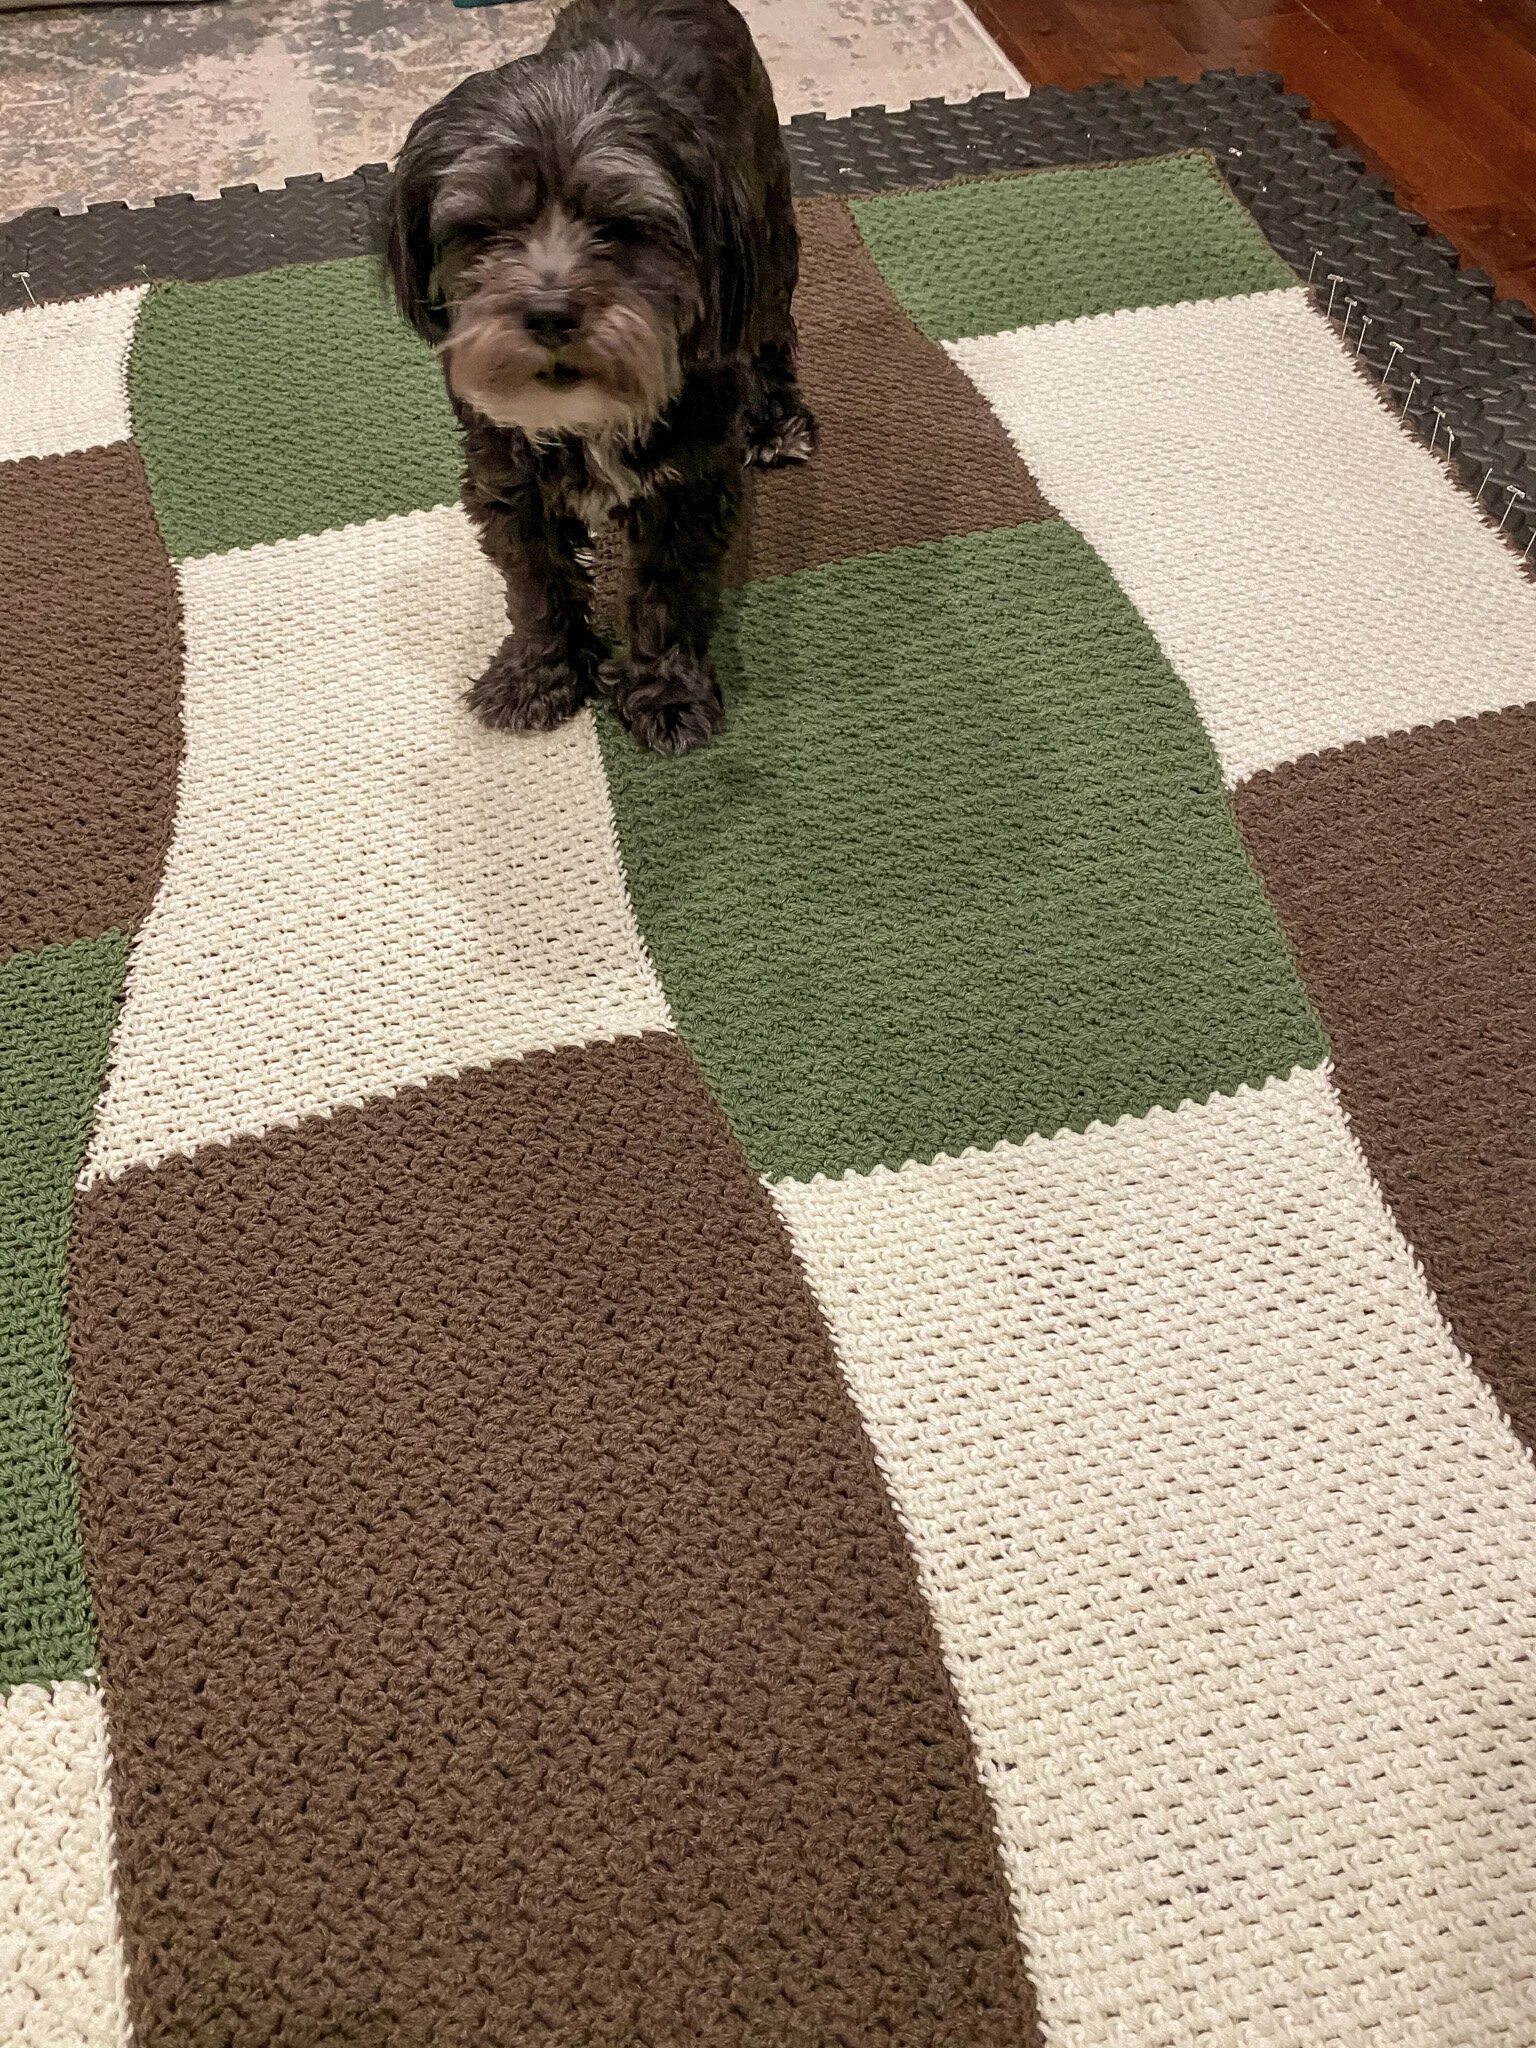
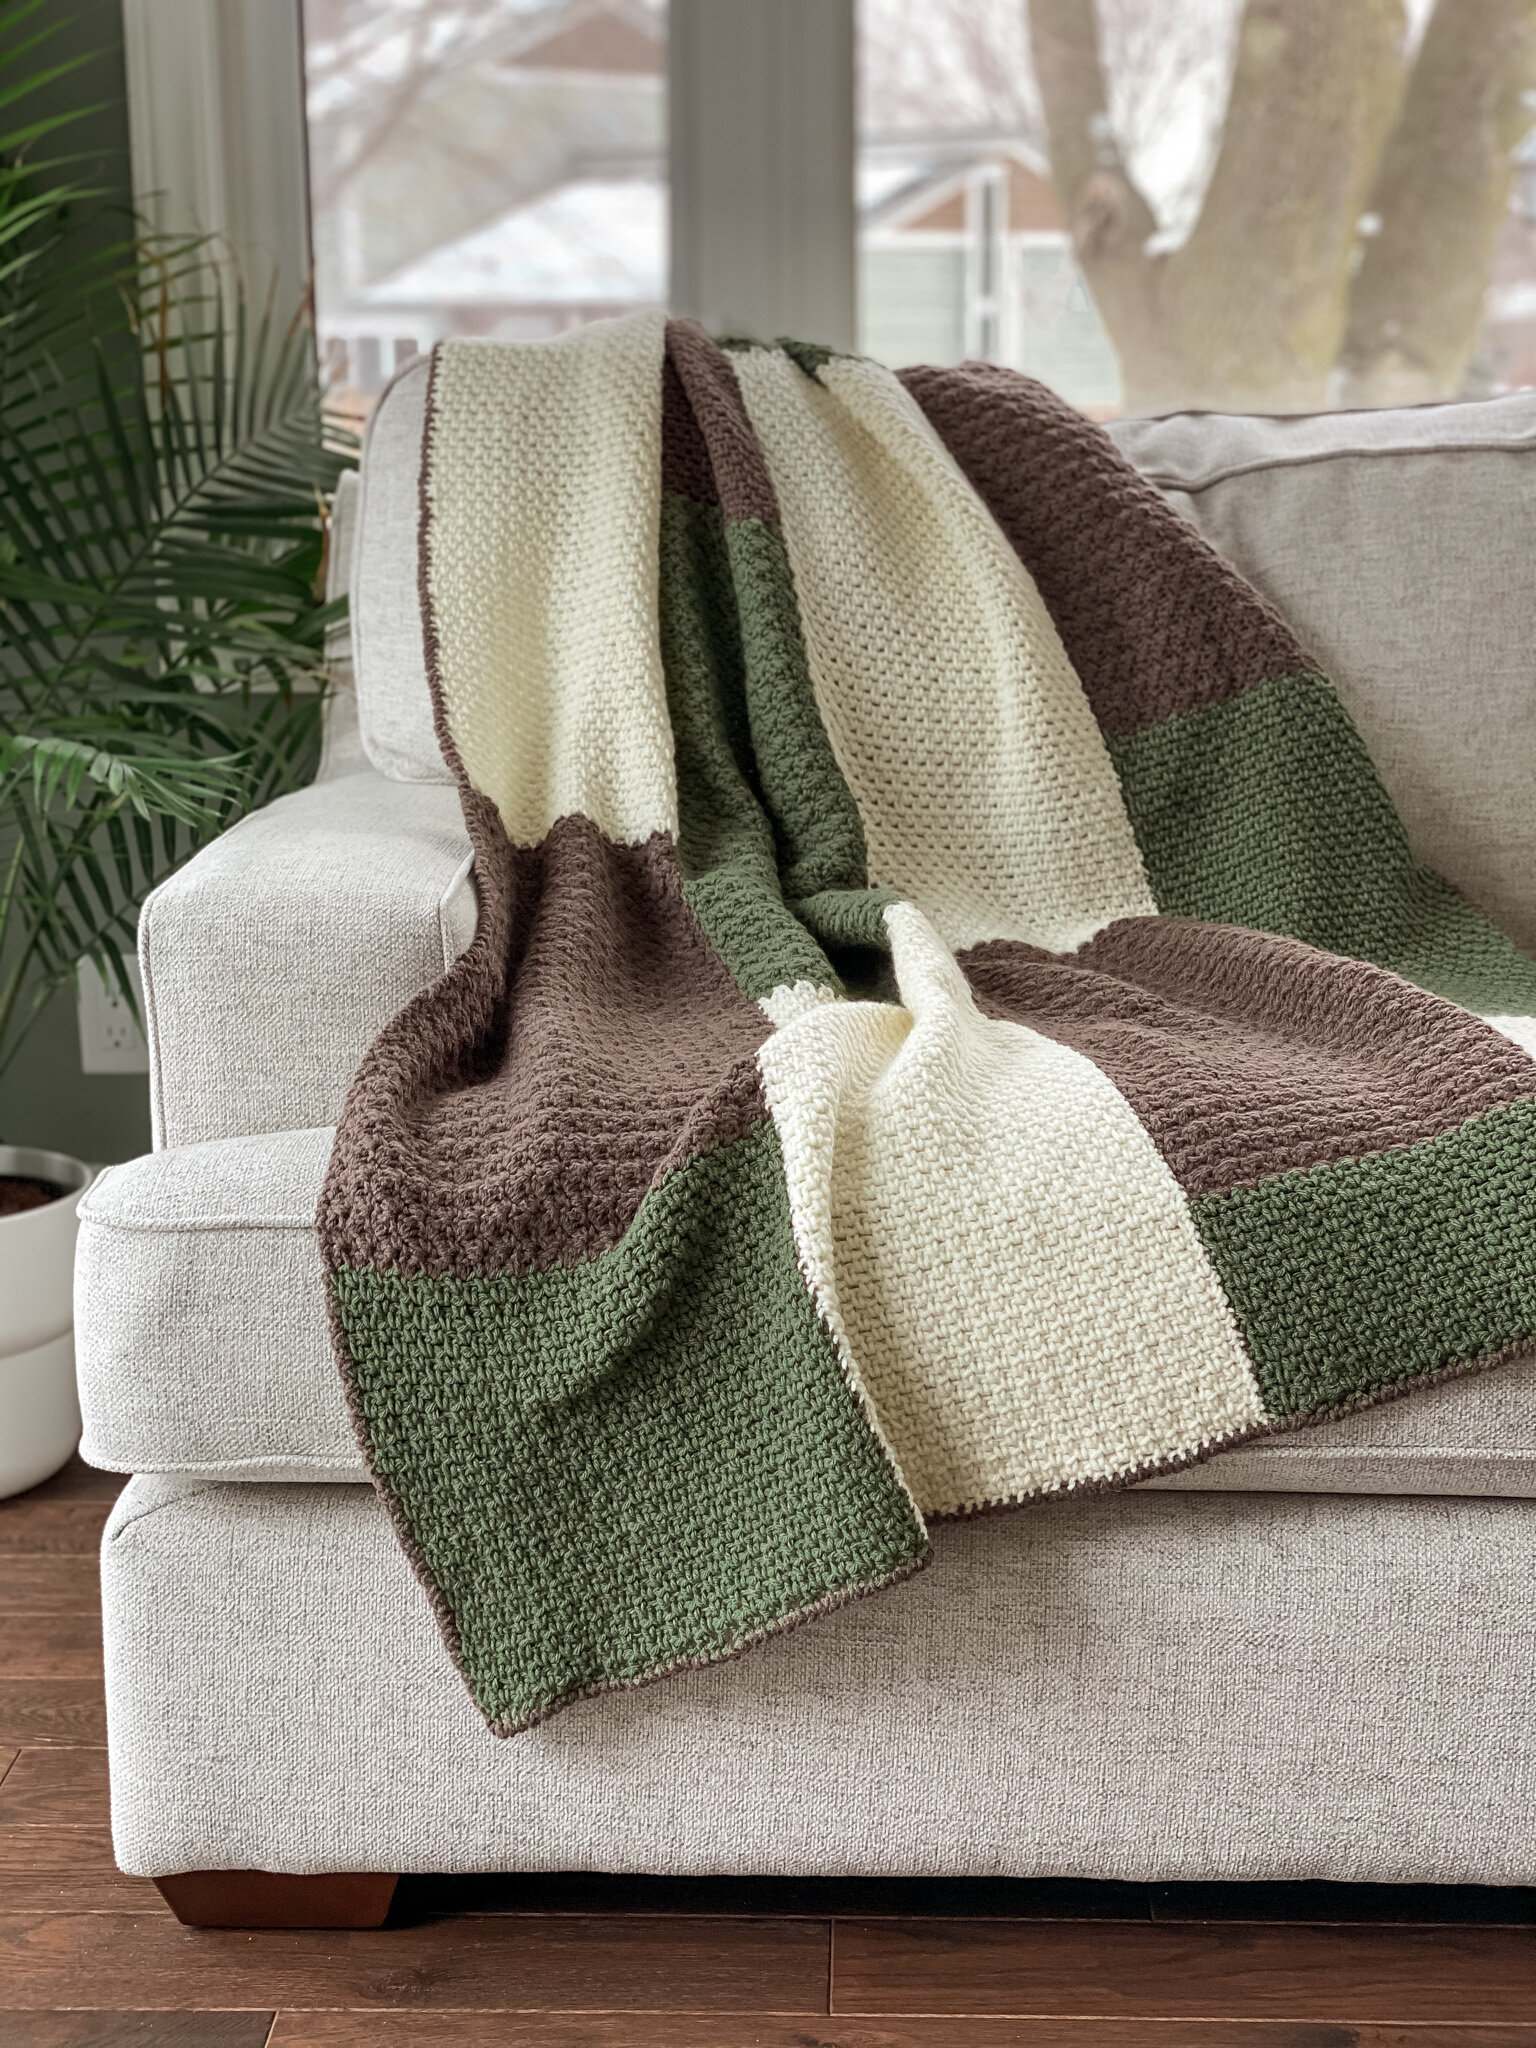
When I was designing this blanket, I wanted to create a bold, colour-blocked look. Something clean, easy to construct and full of texture. Something that would work in both modern and traditional settings with an edge.
I did a test swatch (which you can see in my video) but it was lacking a bit of intrigue. So I set out to create a shape that was less boxy and more moxie! By choosing stitches that worked up in different widths, I was able to create a look that has some shape to it, without the complication of increasing, decreasing or lots of sewing.
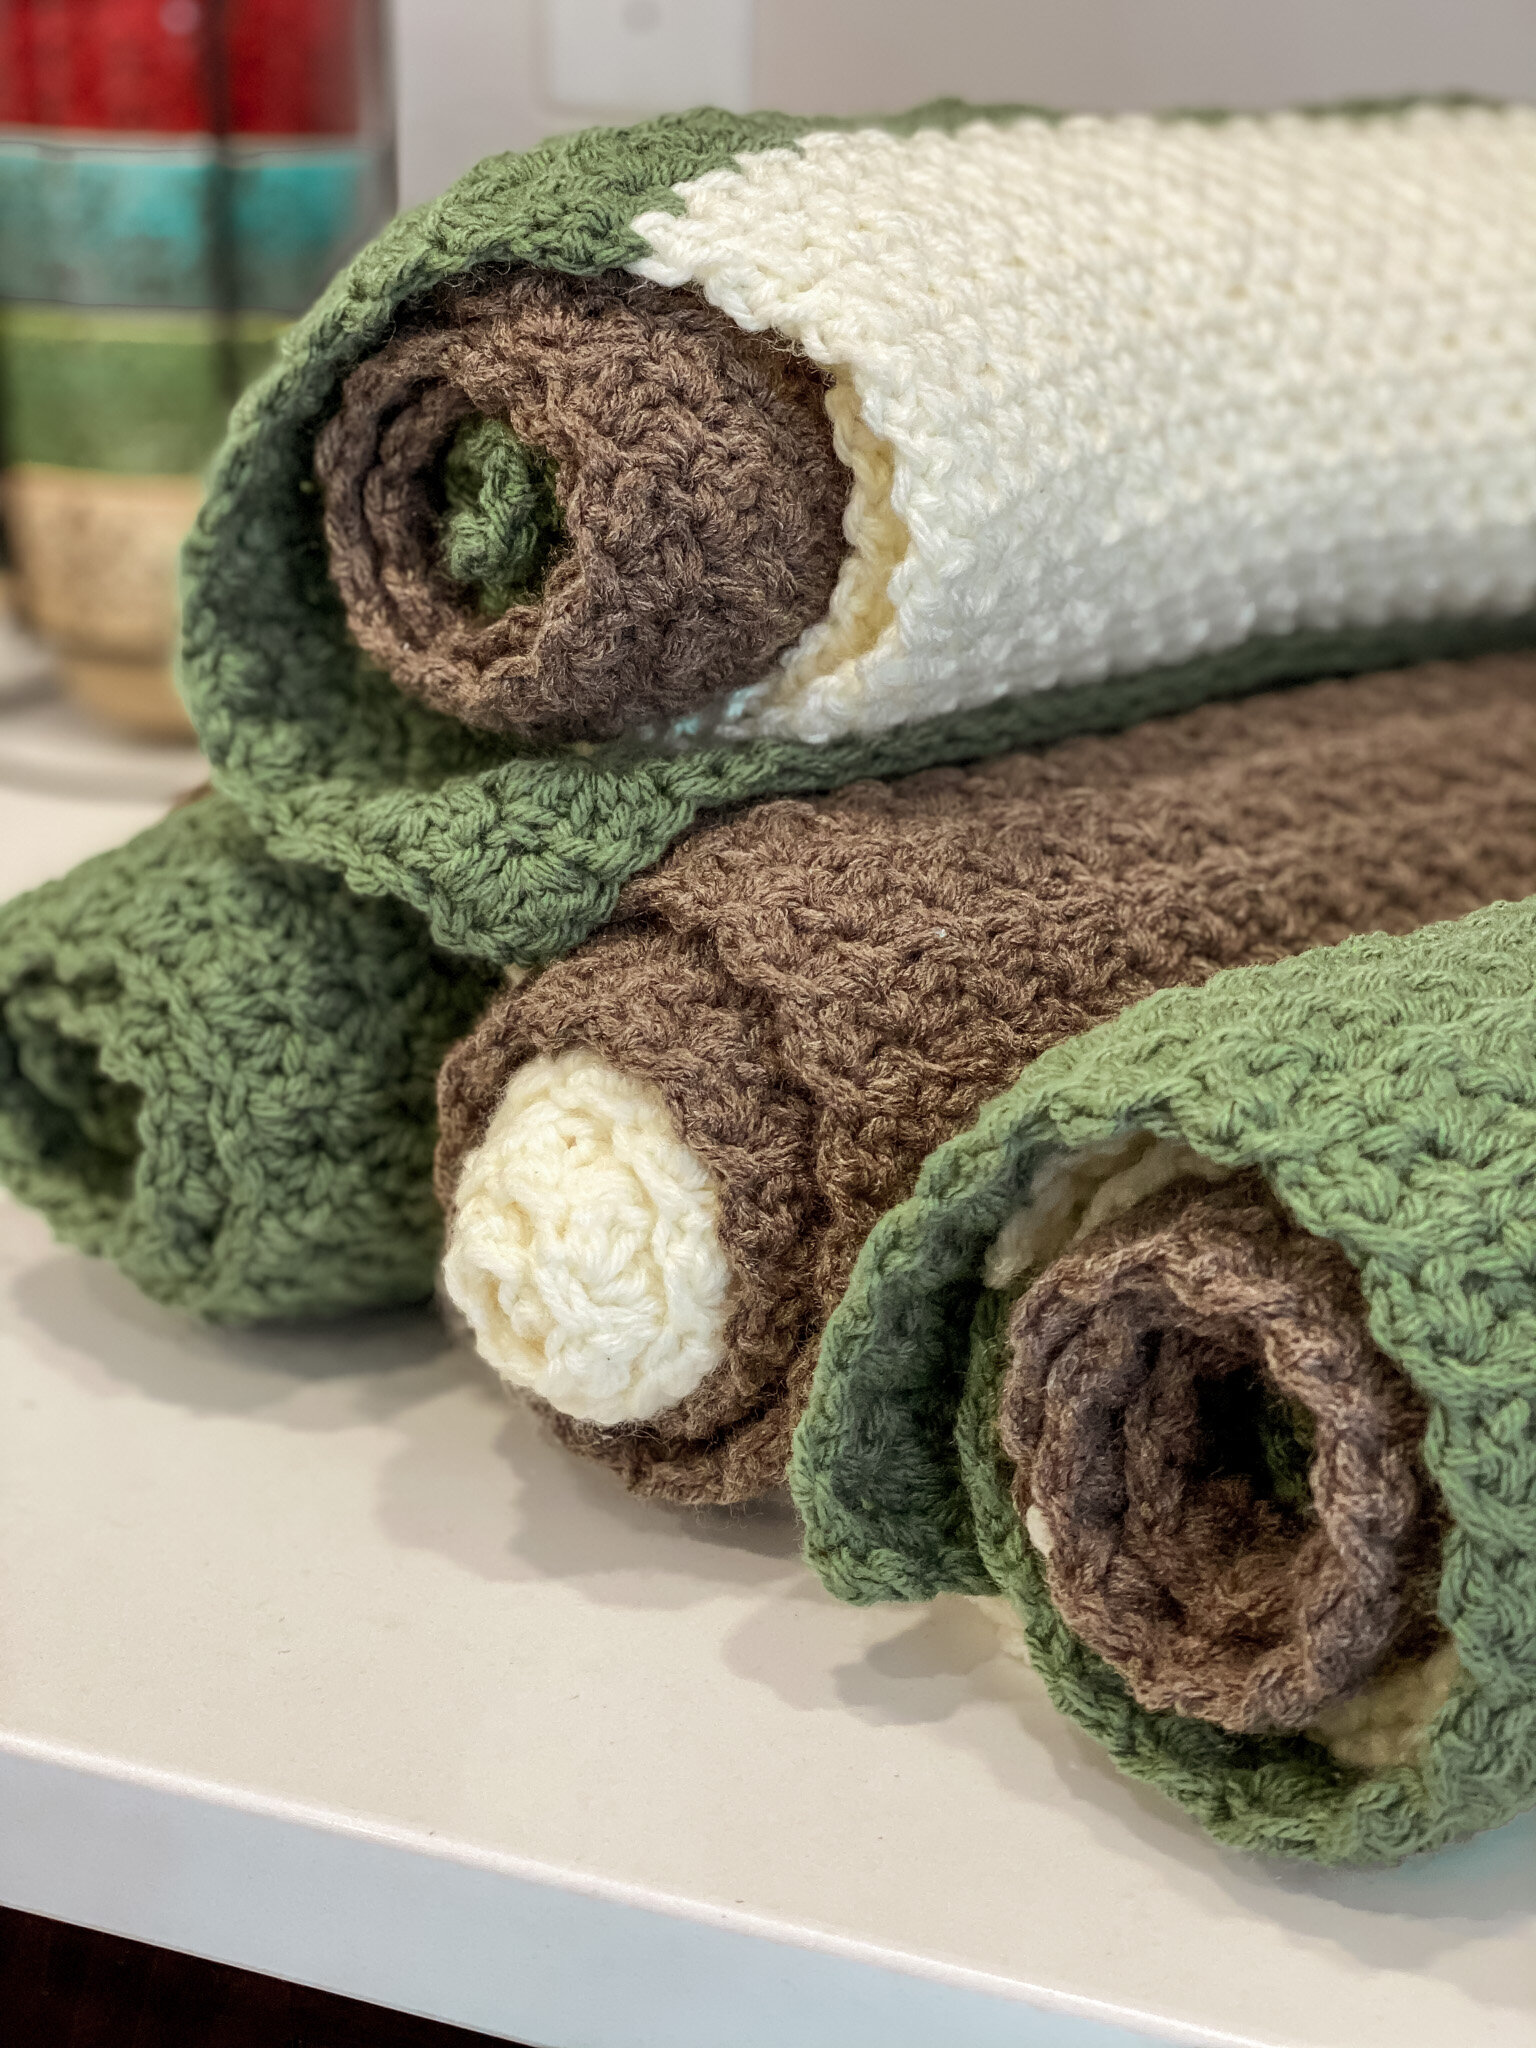
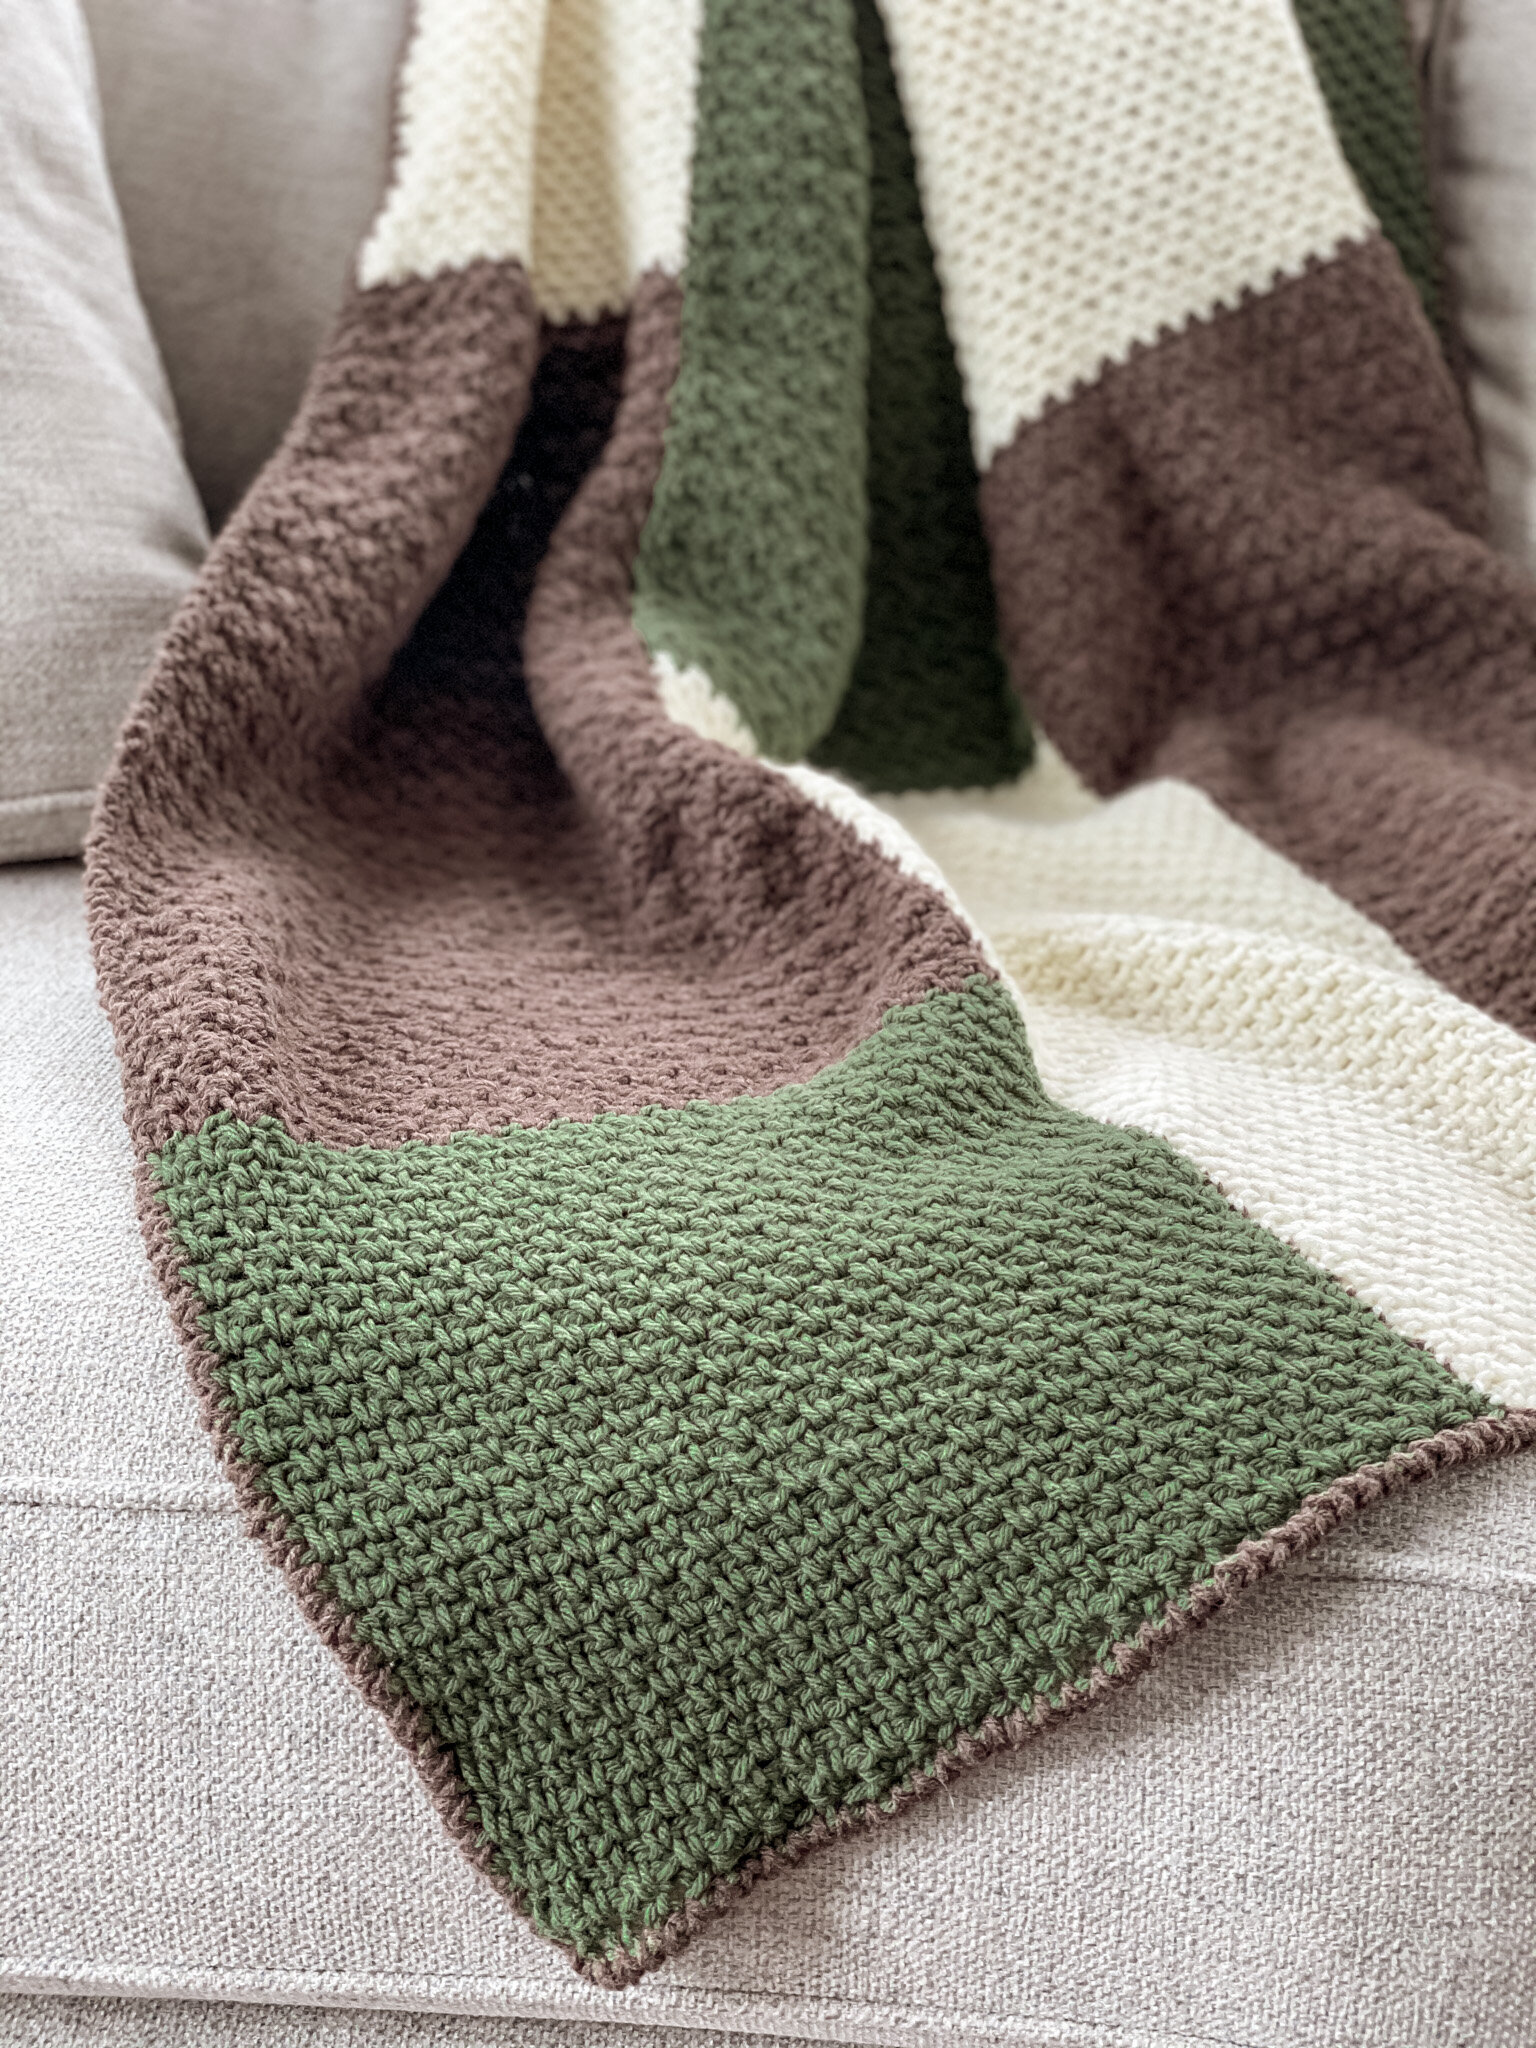
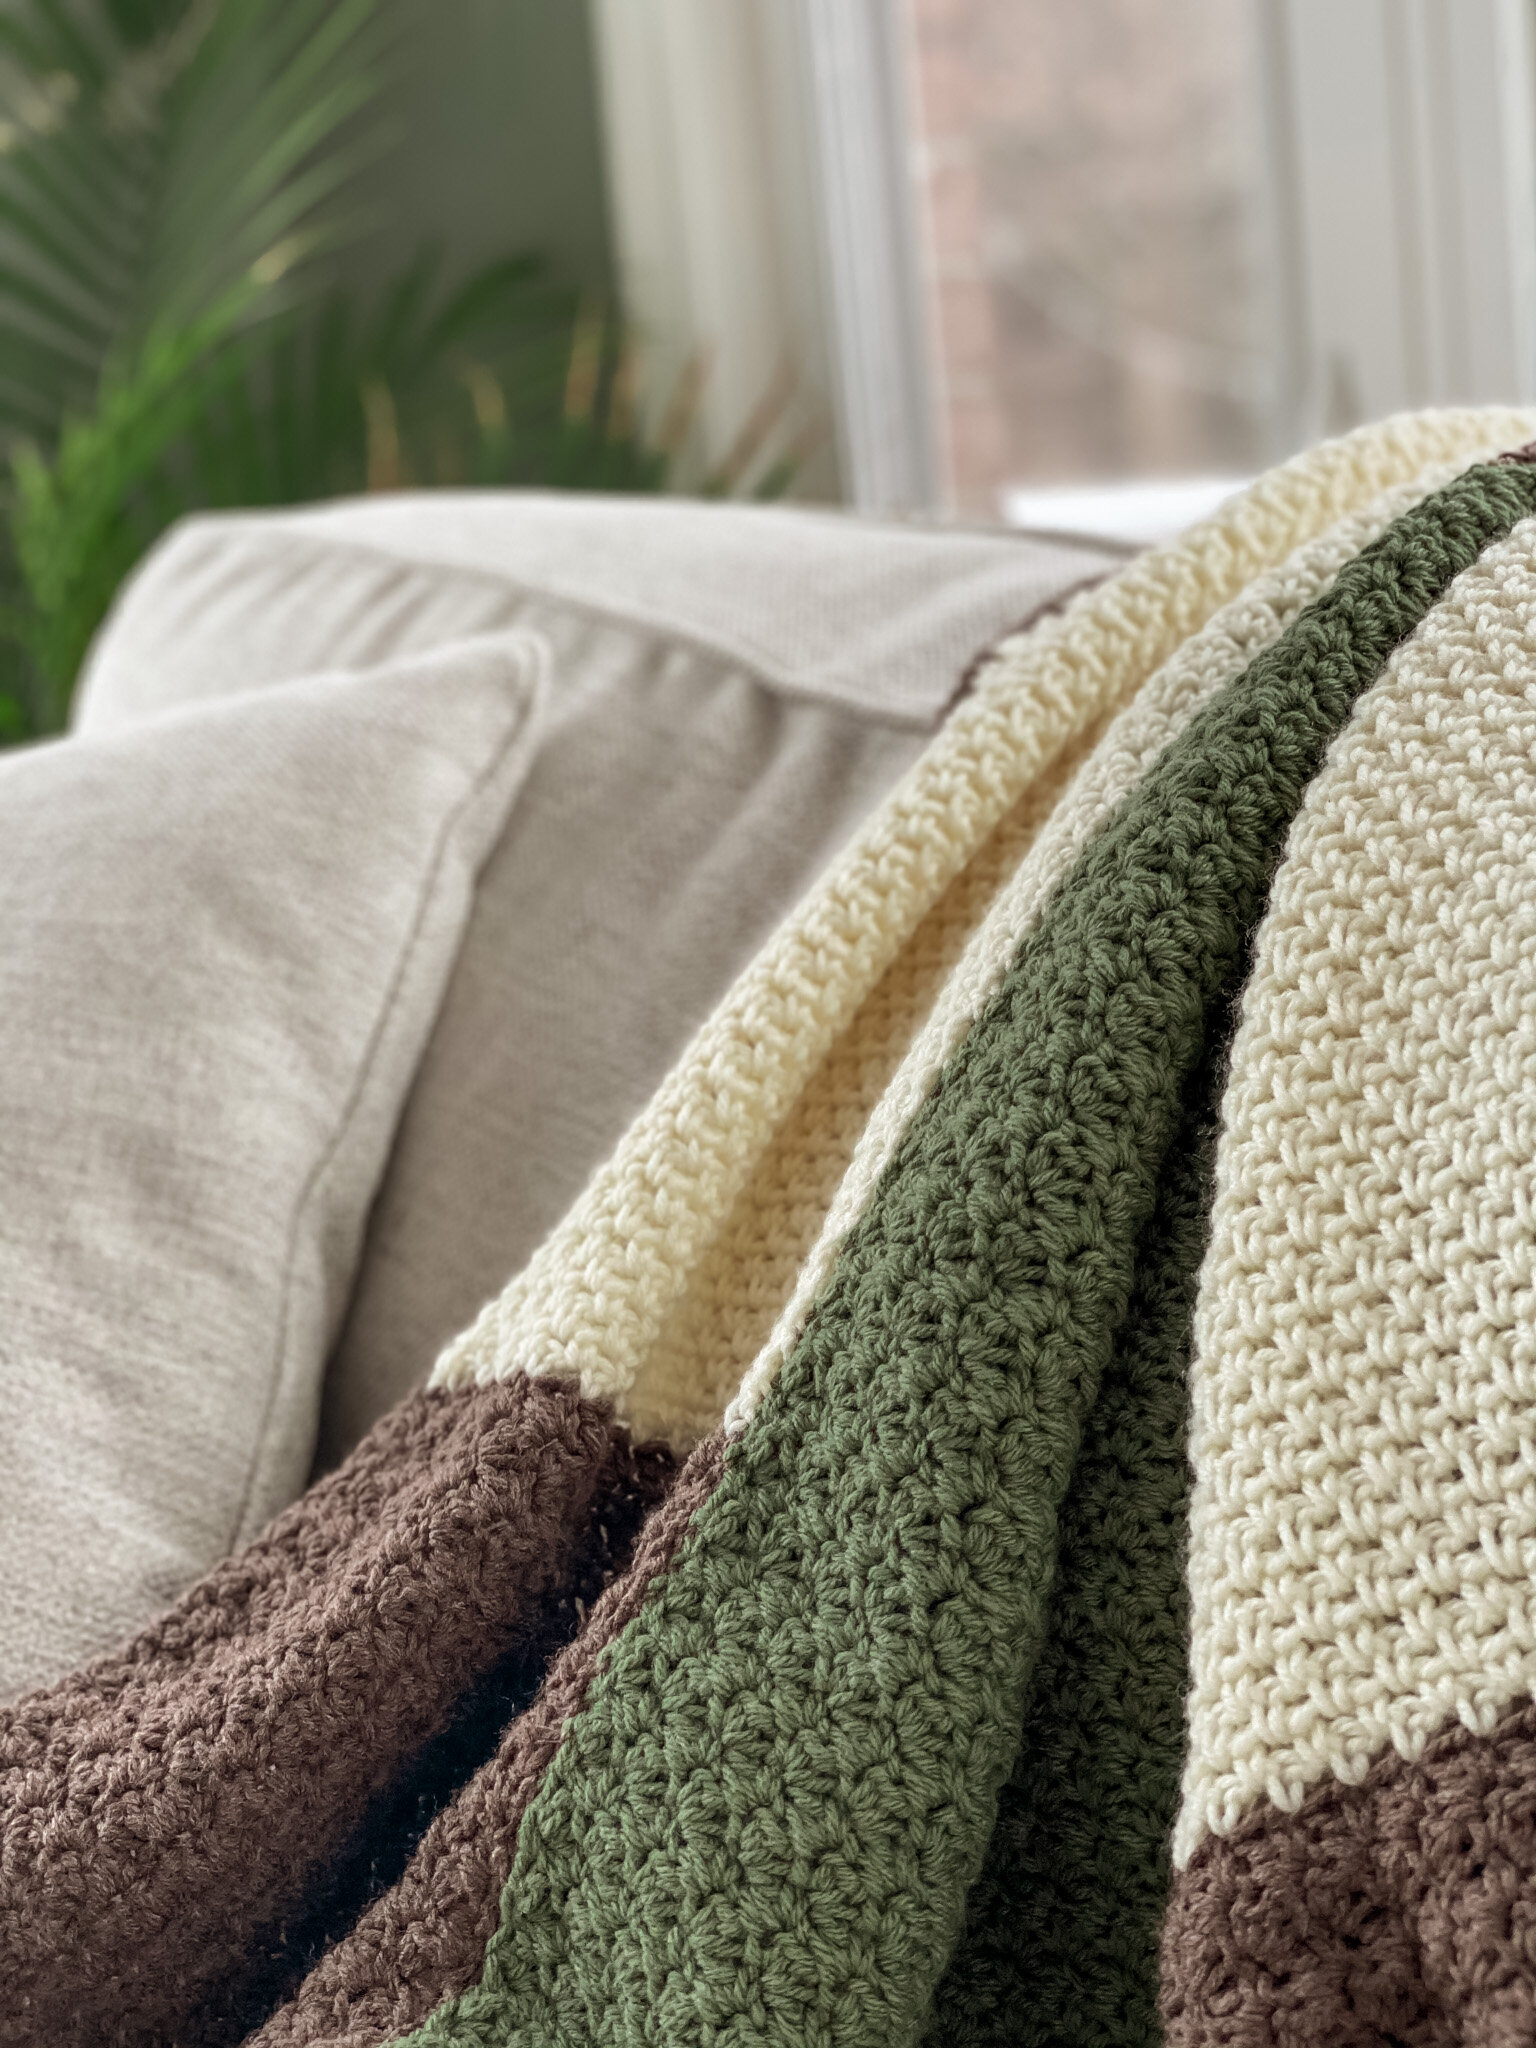
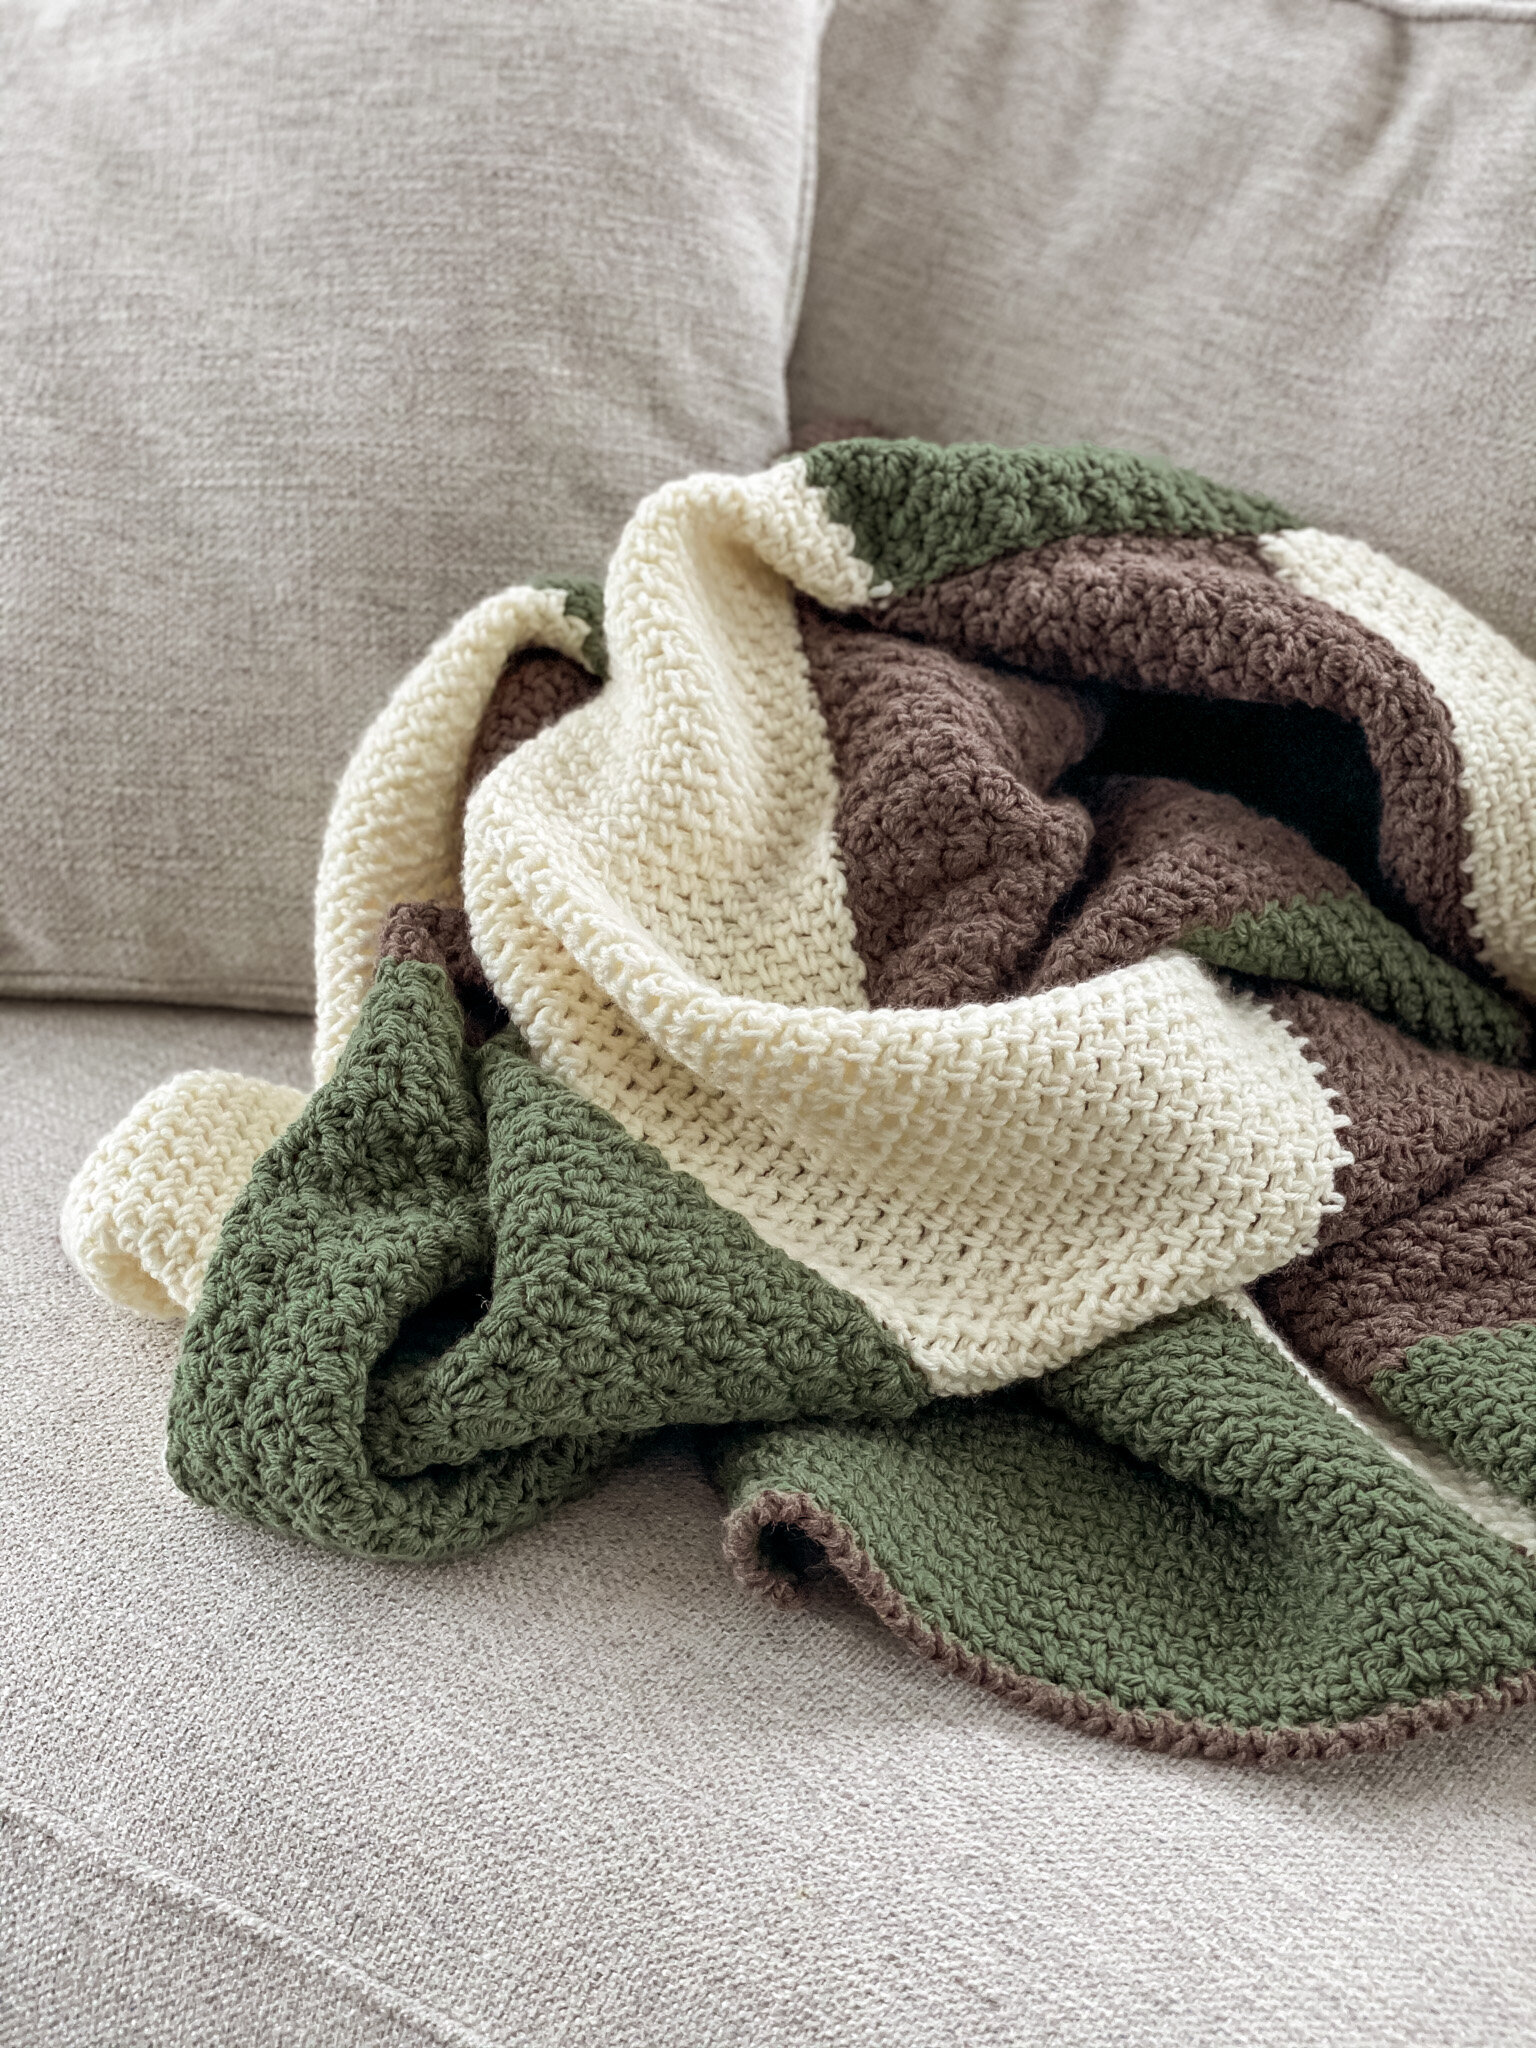
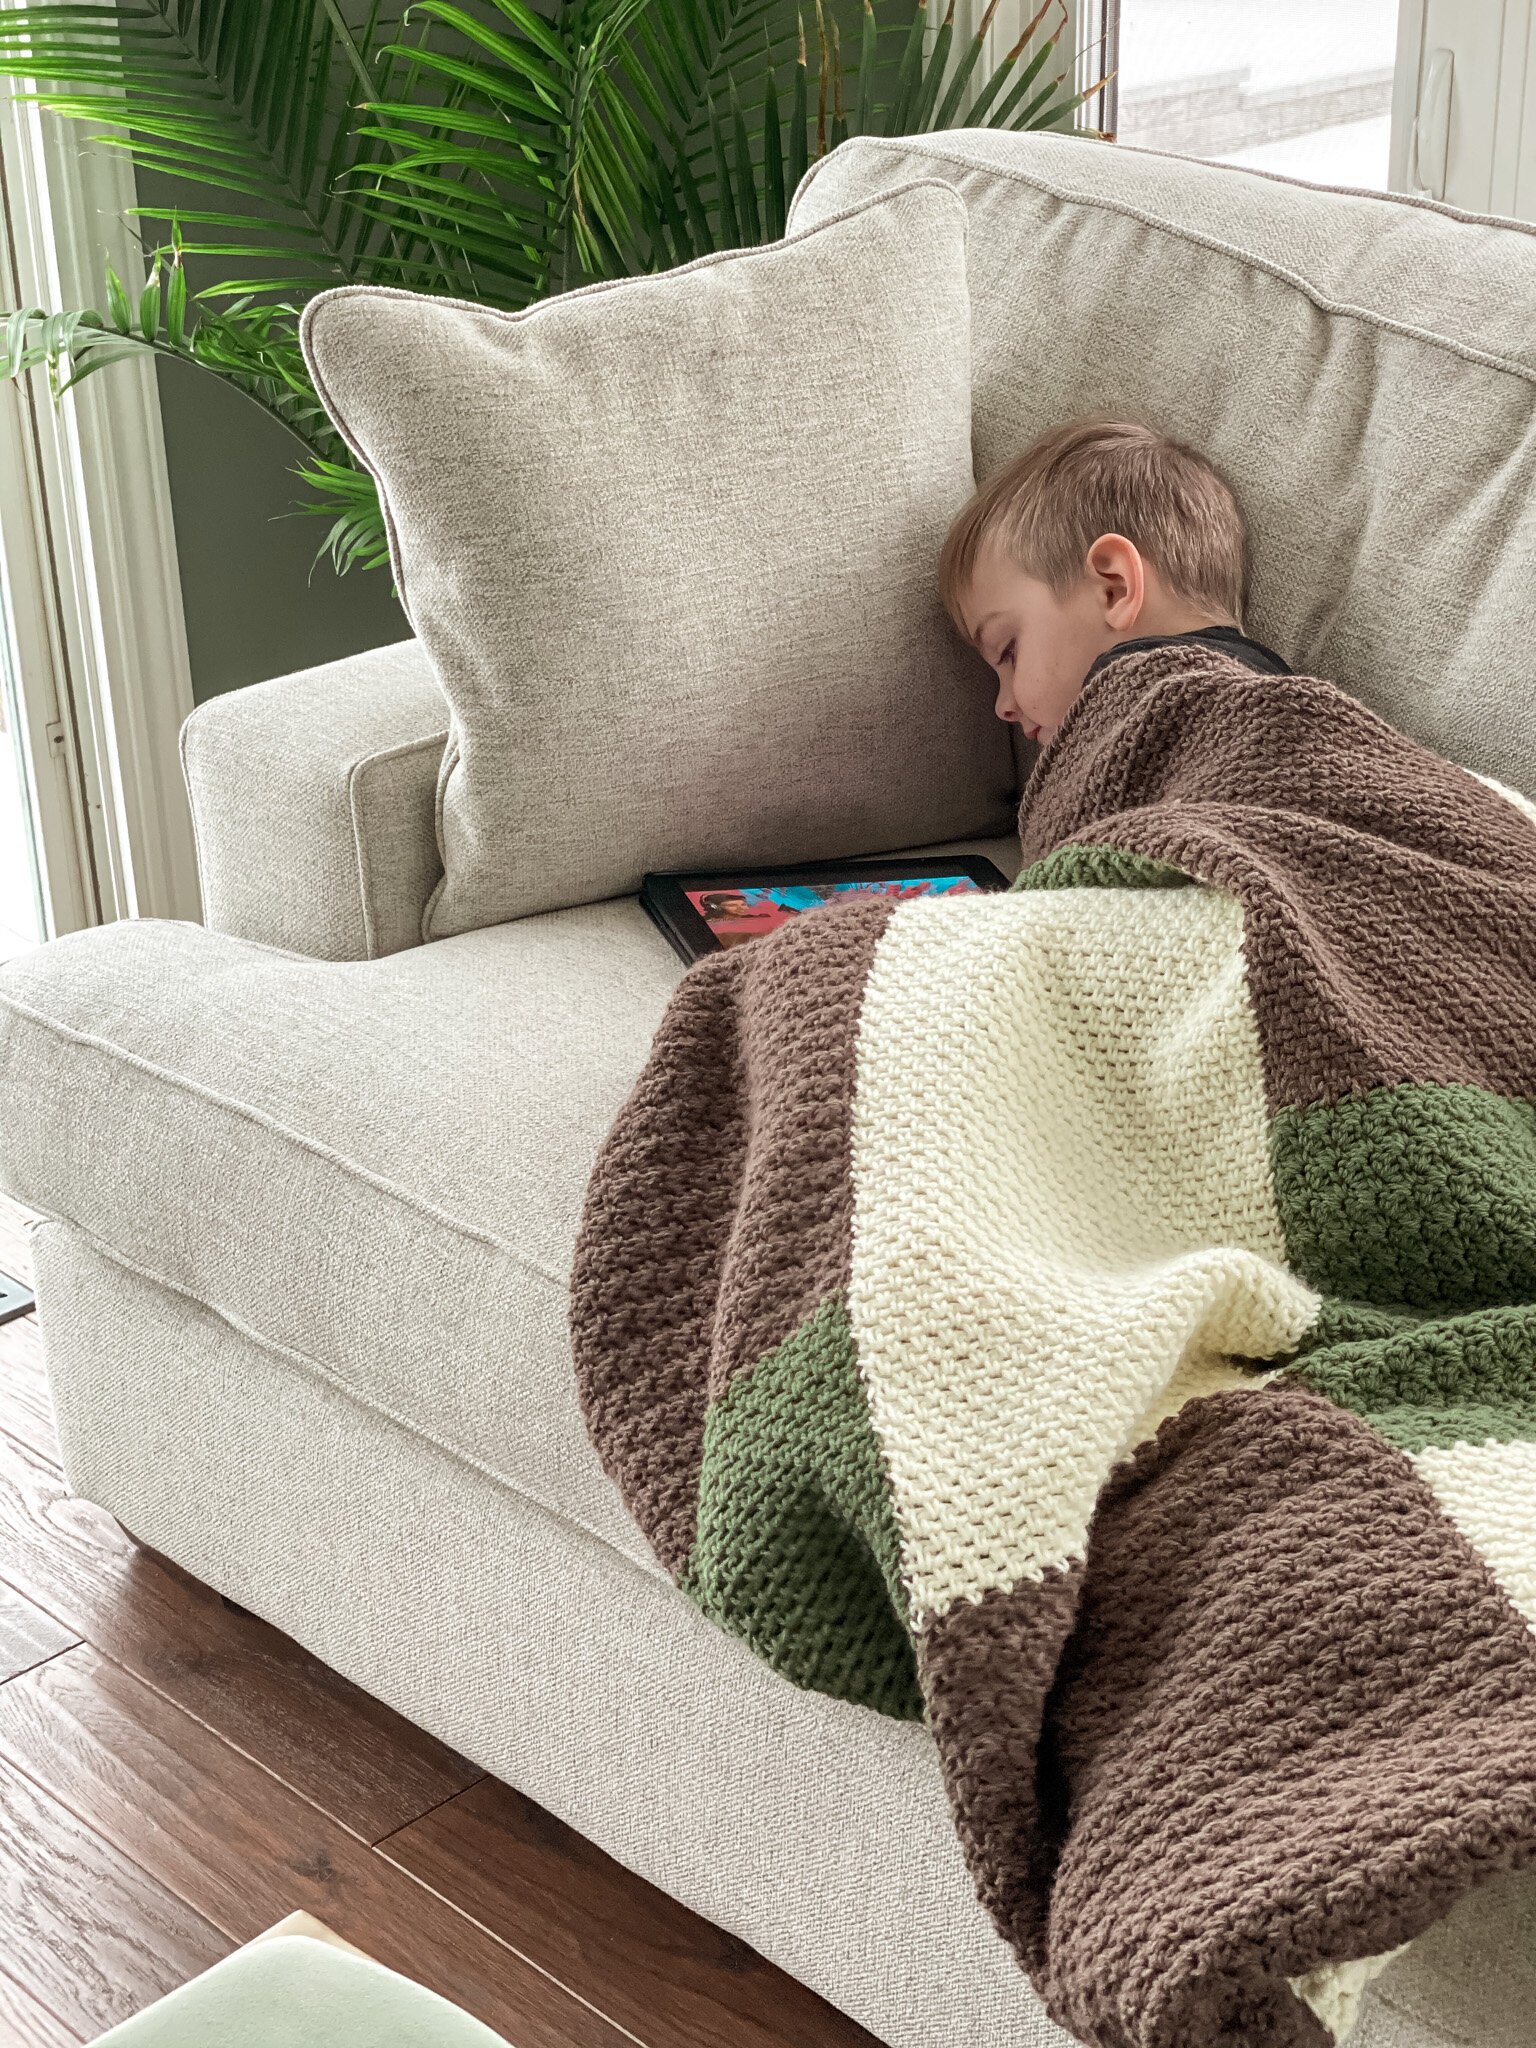
This blanket holds beautiful texture and would work well in very muted tones to blend in or can pop off the couch with bolder colour choices. Either way, she’s full of moxie and very easy to work up and finish!
Trust me, this is easier to make than it looks! A playful take on colours and texture that will work for any home… and easily adaptable to other yarn weights and textures.
My posts may contain affiliate links that help support the content on my site at no extra cost to you, so I can keep bringing you free patterns to enjoy and share with the world. Please review my Privacy Policy for more details, including my Copyright Policy about pattern making, credit and sharing. Happy crafting!
Intro and Materials

CHECK THIS OUT!
This earthy-toned blanket pattern has been developed in partnership with Connected to the Land, a Canadian-based content provider for DIY outdoor living and home life topics. Show some support and join their community!
Skill level: Beginner to Intermediate
Making time: ~20 hours (depends on your skill and speed)
Materials needed:
Yarn, worsted weight in 3 colours A (350g/800yd), B (375g/850yd) and C (350g/800yd)… this yardage is just an estimate and actual yardage depends on yarn weight and gauge.
I used Bernat Super Value in A - Forest Green, B - Taupe Heather and C - Natural, 2 balls of each
I got the yarn on sale for ~$5 CAD each so it’s a $30 blanket!
If you’re in Canada, check your local stores: Lens Mill, Peavy Mart (did you know they sell yarn now?!?), Michaels, Wal-mart or ask your local yarn store for an equivalent worsted acrylic
If you want to splurge you can easily use a higher end yarn for this, even if it’s a different yarn weight! Yardage will change but the overall plan is based on measurements rather than stitch counts.
Other cost-effective subs that come in a variety of colours are Vanna’s Choice by Lion Brand, Brava by Knit Picks or Pound of Love by Lion Brand
Crochet Hook, 6.0mm or an appropriate size based on your yarn. I prefer metal hooks (mine are mostly these!)
Scissors
Tapestry needle for finishing
(Optional) Blocking materials
Some links to generally what I use: foam mats (you’ll need 30 square feet for this project), t-pins, knit blockers and a hand steamer for my acrylic blocking!
Knit Picks has a great blocking starter kit that’s often on sale!
Pattern Tutorial

Watch the video for a full tutorial!
Note: you can make adjustments based on the yarn you’re using. What’s important is meeting the size requirements for the squares and panels!
Stitches
Moss stitch starting row: ch39, sc in 3rd ch from hook, *ch1, sk st, sc* to end, turn.
Moss stitch standard row: ch2, sc in 1st ch sp, *ch 1, sc in ch sp* to end, turn.
Moss to Grit transition row: at the end of the moss stitch row, change colour on last sc, turn. ch1, dc in same st. *sc, dc* into each sc from previous row, skipping the ch spaces. Make 1 sc into the last st (sc from the previous row), turn.
Grit stitch starting row: ch38, dc into 2nd ch from hook, sk 1 ch, *work an sc and dc into the next st, sk st* across to the last st, sc in last st, turn.
Grit stitch standard row: ch 1, dc in same st, sk next st. *work an sc and dc into the next st, sk st* across to last st, sc in last st, turn.
Grit to Moss transition: at the end of the grit stitch row, change colour on last sc, turn. Ch 2, sc into same st, sk st, *ch1, sk st, sc* across, ending on a turning chain, turn.
Crab stitch (for border): (also called reverse sc), working sc across in the opposite direction. A great tutorial from Moogly is here.
My tutorial video above covers all of these stitches, including starting rows, standard rows and transition rows!
Gauge:
Moss stitch: 13 st (7sc, 6ch) x 15 rows in a 4x4 square
Grit stitch: 13 st (7 sc,dc clusters, 6 sk st) x 11 rows in a 4x4 square
Schematic
The schematic is the key to this blanket! Here is the overall plan:
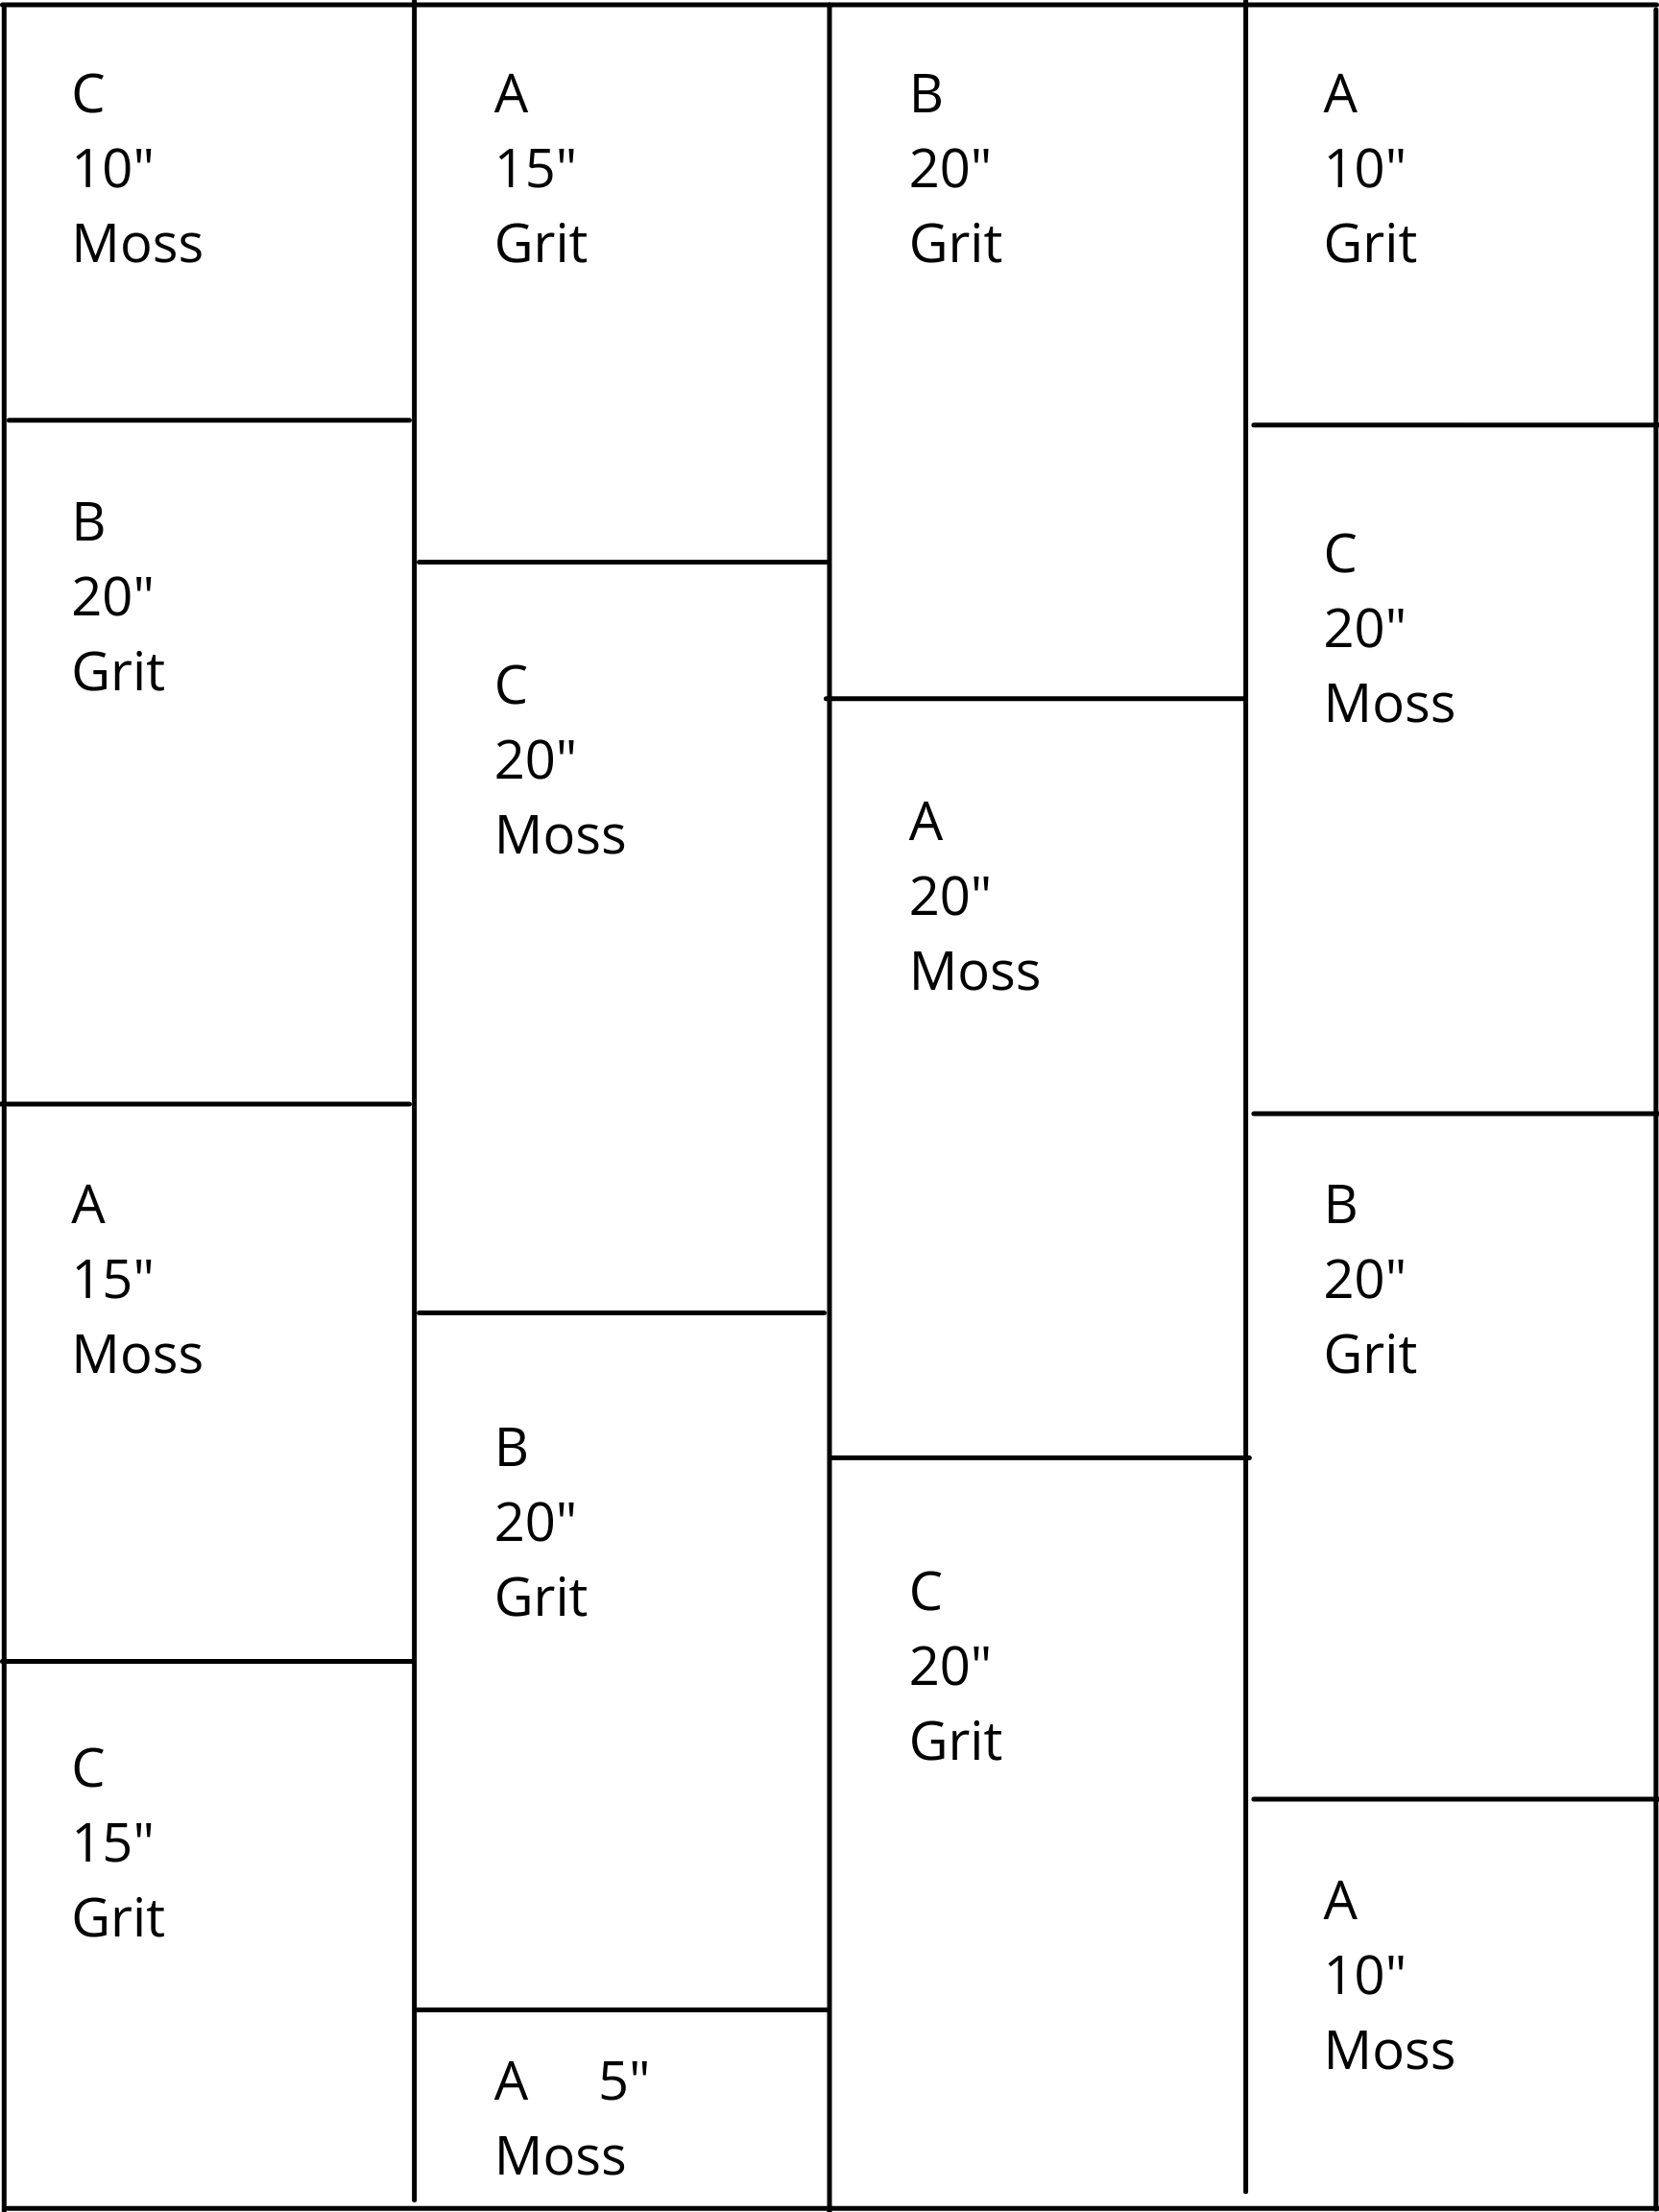

There are 4 vertical panels that are constructed from bottom to top.
Based on my gauge, here are the row counts for each stitch/length combination:
Moss: 5” = 18 rows, 10” = 36 rows, 15” = 54 rows, 20” = 72 rows
Grit: 5” = 13 rows, 10” = 26 rows, 15” = 39 rows, 20” = 52 rows
Pattern
There are 2 ways for you to make the body - using the schematic and stitches above, or using the full written body instructions. I’ve provided both for you! But note the written instructions rely on having gauge similar to mine!

Blanket Body Recipe
Construct each panel to be 12” wide, working the correct colour, section length and stitch based on the schematic above. For each panel, start from the bottom and work your way up to the top.
Each finished panel should measure 12” wide by 60” long.
If you use this recipe, skip the written pattern below and jump to the “Joining Panels” section of the blog!
Do not be concerned when the moss and grit sections of a panel are different widths from each other - this is what will bring the MOXIE into the blanket!
For example, the rightmost panel would use colour A and do the following:
Moss stitch starting row in A
Moss stitch standard rows for 10” in A
Moss stitch to grit stitch transition row, switching to B
Grit stitch standard rows for 20” in B
Grit stitch to moss stitch transition row, switching to C
Moss stitch standard rows for 20” in C
Moss stitch to grit stitch transition row, switching to A
Grit stitch standard row for 10” in A, fasten off
Blanket Body Written Pattern
This is the full written pattern, which relies on a similar gauge to mine. If you’d rather use customization check out the recipe directly above!
Rightmost panel:
Row 1: Using A, ch39, sc in 3rd ch from hook, *ch1, sk st, sc* to end, turn.
Rows 2-36: ch2, sc in 1st ch sp, *ch 1, sc in ch sp* to end, turn.
Row 37: Using B, ch1, dc in same st. *sc, dc* into each sc from previous row, skipping the ch spaces. Make 1 sc into the last st (sc from the previous row), turn.
Rows 36-88: ch 1, dc in same st, sk next st. *work an sc and dc into the next st, sk st* across to last st, sc in last st, turn.
Row 89: Using C, ch 2, sc into same st, sk st, *ch1, sk st, sc* across, ending on a turning chain, turn.
Rows 90-160: ch2, sc in 1st ch sp, *ch 1, sc in ch sp* to end, turn.
Row 161: Using A, ch1, dc in same st. *sc, dc* into each sc from previous row, skipping the ch spaces. Make 1 sc into the last st (sc from the previous row), turn.
Rows 162-186: ch 1, dc in same st, sk next st. *work an sc and dc into the next st, sk st* across to last st, sc in last st, turn.
Fasten off.
Second from right panel:
Row 1: Using C, ch38, dc into 2nd ch from hook, sk 1 ch, *work an sc and dc into the next st, sk st* across to the last st, sc in last st, turn.
Rows 2-52: ch 1, dc in same st, sk next st. *work an sc and dc into the next st, sk st* across to last st, sc in last st, turn.
Row 53: Using A, ch 2, sc into same st, sk st, *ch1, sk st, sc* across, ending on a turning chain, turn.
Rows 54-124: ch2, sc in 1st ch sp, *ch 1, sc in ch sp* to end, turn.
Row 125: Using B, ch1, dc in same st. *sc, dc* into each sc from previous row, skipping the ch spaces. Make 1 sc into the last st (sc from the previous row), turn.
Rows 126-176: ch 1, dc in same st, sk next st. *work an sc and dc into the next st, sk st* across to last st, sc in last st, turn.
Fasten off.
Second from left panel:
Row 1: Using A, ch39, sc in 3rd ch from hook, *ch1, sk st, sc* to end, turn.
Rows 2-18: ch2, sc in 1st ch sp, *ch 1, sc in ch sp* to end, turn.
Row 19: Using B, ch1, dc in same st. *sc, dc* into each sc from previous row, skipping the ch spaces. Make 1 sc into the last st (sc from the previous row), turn.
Rows 20-70: ch 1, dc in same st, sk next st. *work an sc and dc into the next st, sk st* across to last st, sc in last st, turn.
Row 71: Using C, ch 2, sc into same st, sk st, *ch1, sk st, sc* across, ending on a turning chain, turn.
Rows 72-142: ch2, sc in 1st ch sp, *ch 1, sc in ch sp* to end, turn.
Row 143: Using A, ch1, dc in same st. *sc, dc* into each sc from previous row, skipping the ch spaces. Make 1 sc into the last st (sc from the previous row), turn.
Rows 144-181: ch 1, dc in same st, sk next st. *work an sc and dc into the next st, sk st* across to last st, sc in last st, turn.
Fasten off.
Leftmost panel:
Row 1: Using C, ch38, dc into 2nd ch from hook, sk 1 ch, *work an sc and dc into the next st, sk st* across to the last st, sc in last st, turn.
Rows 2-39: ch 1, dc in same st, sk next st. *work an sc and dc into the next st, sk st* across to last st, sc in last st, turn.
Row 40: Using A, ch 2, sc into same st, sk st, *ch1, sk st, sc* across, ending on a turning chain, turn.
Rows 41-93: ch2, sc in 1st ch sp, *ch 1, sc in ch sp* to end, turn.
Row 94: Using B, ch1, dc in same st. *sc, dc* into each sc from previous row, skipping the ch spaces. Make 1 sc into the last st (sc from the previous row), turn.
Rows 94-145: ch 1, dc in same st, sk next st. *work an sc and dc into the next st, sk st* across to last st, sc in last st, turn.
Row 146: Using C, ch1, dc in same st. *sc, dc* into each sc from previous row, skipping the ch spaces. Make 1 sc into the last st (sc from the previous row), turn.
Rows 150-181: ch 1, dc in same st, sk next st. *work an sc and dc into the next st, sk st* across to last st, sc in last st, turn.
Fasten off.

Joining Panels
Using colour B (or whichever colour you plan to use for the border), join the panels together based on the schematic.
Use the mattress stitch to join (my video shows my technique). This blog post from Moogly is a great reference!

Border
Join colour B (or whichever colour you plan to use for the border) in the middle on any side with the RS facing.
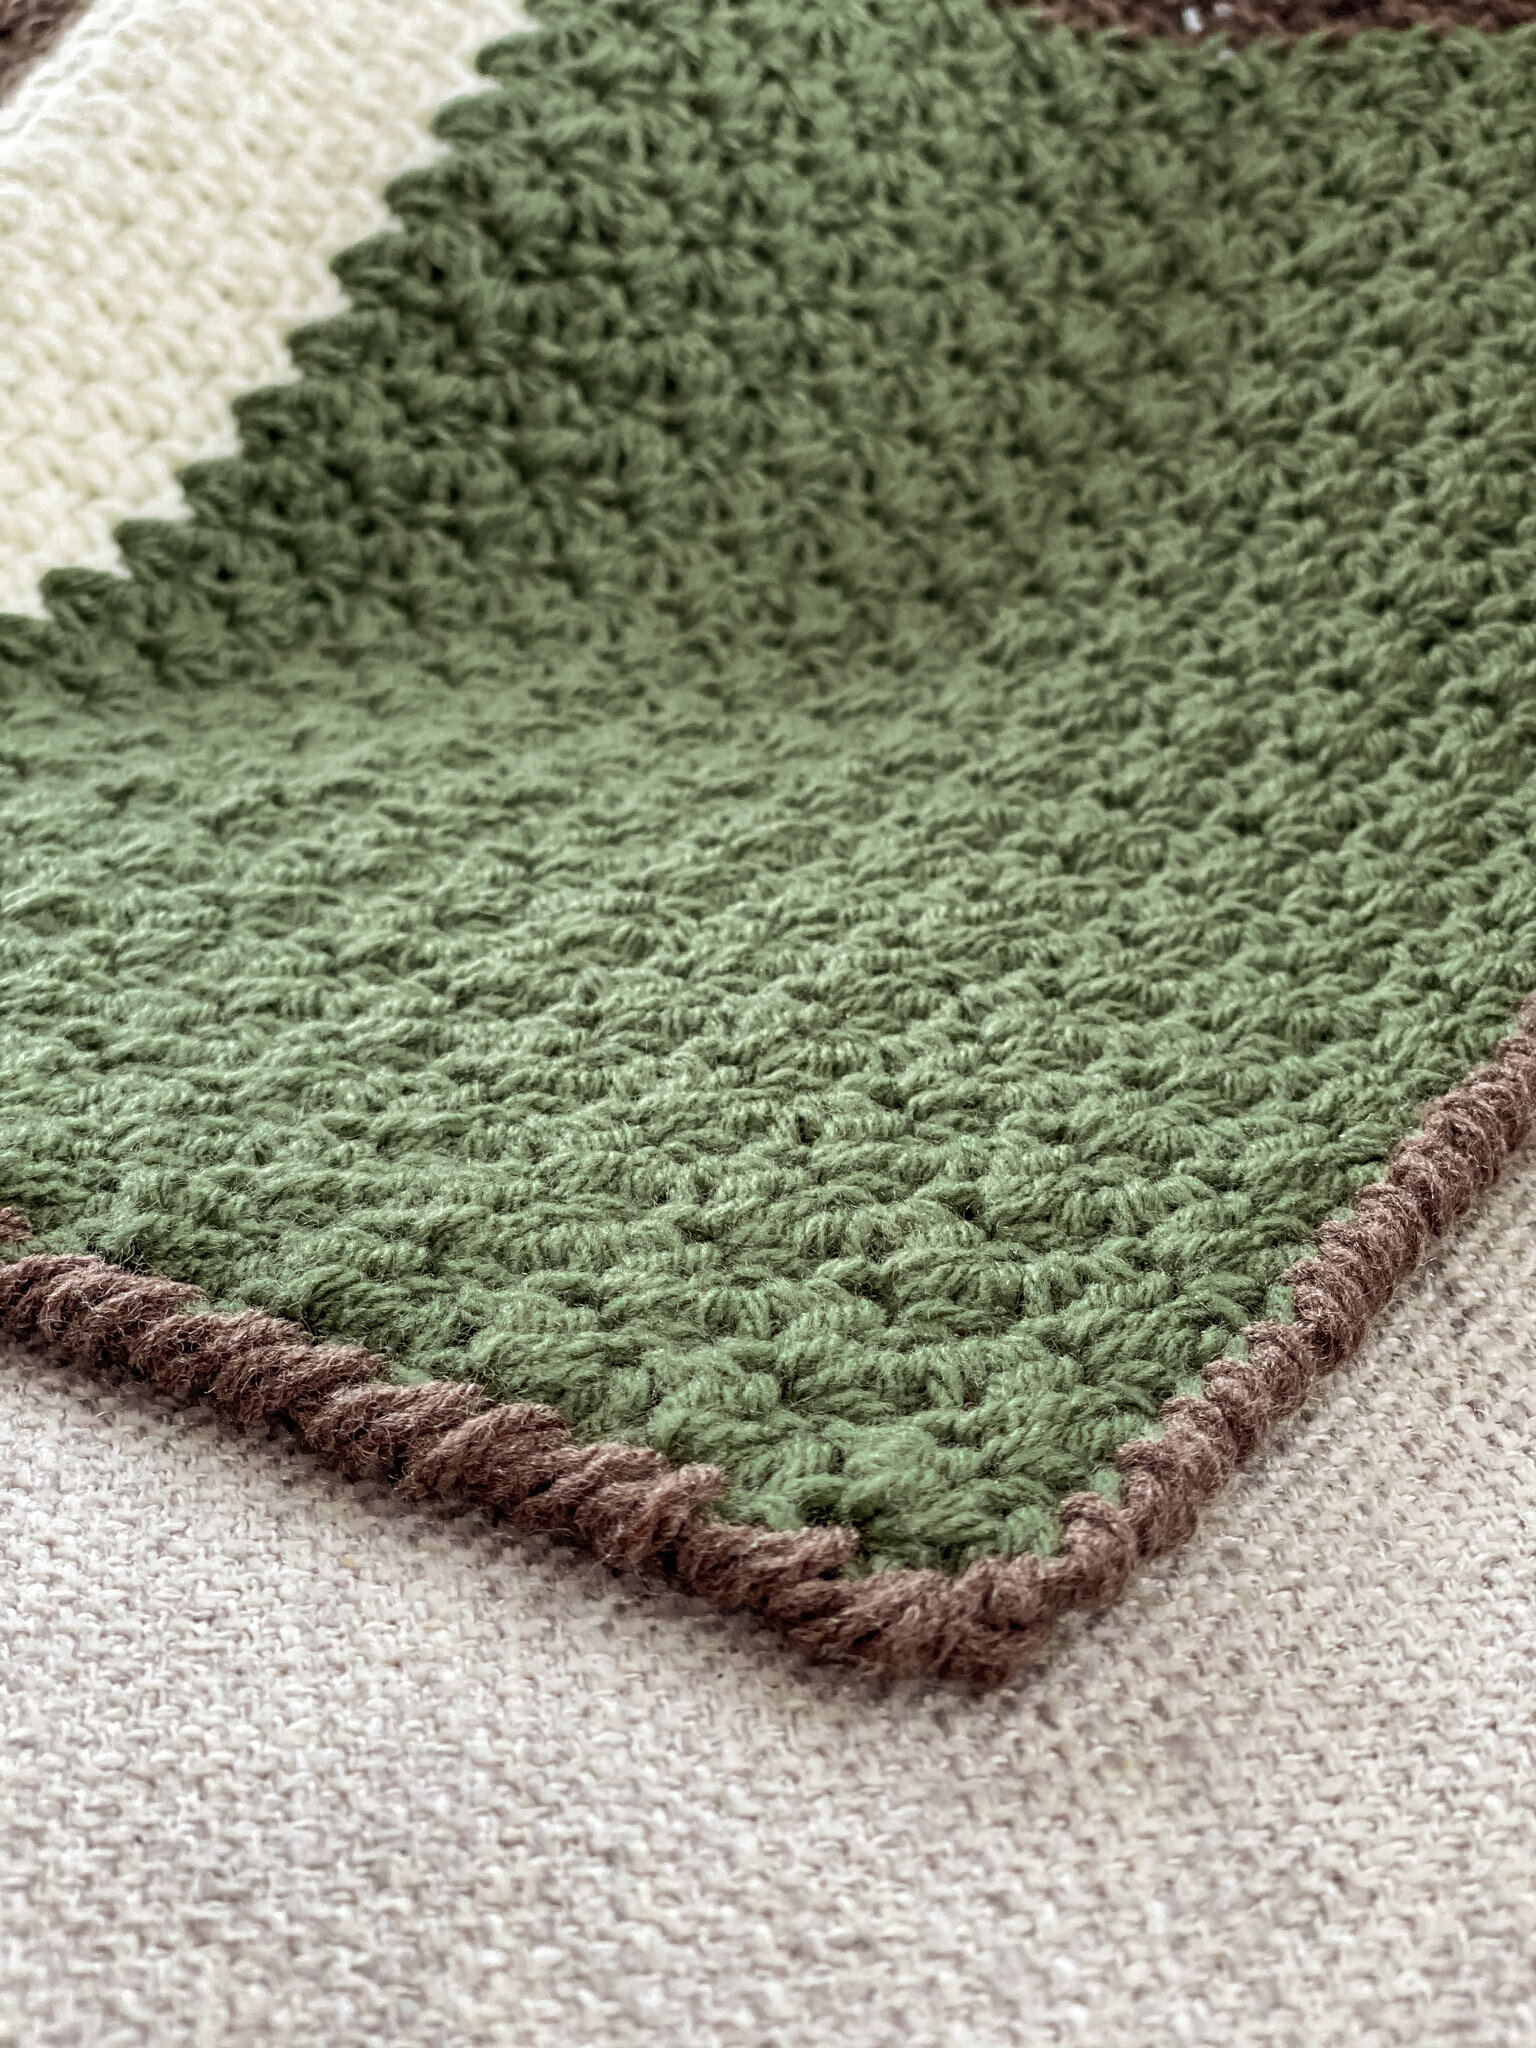
Work the Crab Stitch (see above) around the entire blanket edge, working 2 st into each corner to turn.
If you prefer a thicker border, work one round of sc first and then work the crab stitch as a second round.

Finishing
Weave in all loose ends (see tutorial video for my technique!)
Block to final dimensions (48” w x 60” l), if desired. This makes the edges extra crisp and really shows off the moxie curves of the blanket!
Check the materials listing at the top of the post to see what I use!
“If you obey all the rules, you miss all the fun.”

Flexible enough for any yarn, any stitches
Maybe you’re not feeling these stitches (although they’re great because there are no holes for the toes to get stuck in!)
You can use the schematic to make anything you want! Change the yarn weight, the colours, the stitches… so many things you can play with.
Just stick to the 12” wide panels and 60” x 48” overall size… and HAVE FUN!
“Telling the truth takes moxie, and few have it.”

A blanket the whole family will love.
Sometimes we’re tempted to put style over function. With the Moxie Block Blanket, you don’t have to choose!
“I always thought that the “thriving” would come when everything was perfect, and what I learned is that it’s actually down in the mess that things get good.”